How to create the first test scenario and test the communication channel
To test the scenario on the test communication channel, we need to create a test audience and a test scenario. Let's start with creating a test audience (Step 1), and then move on to creating a test scenario (Step 2):
How to create a test audience:
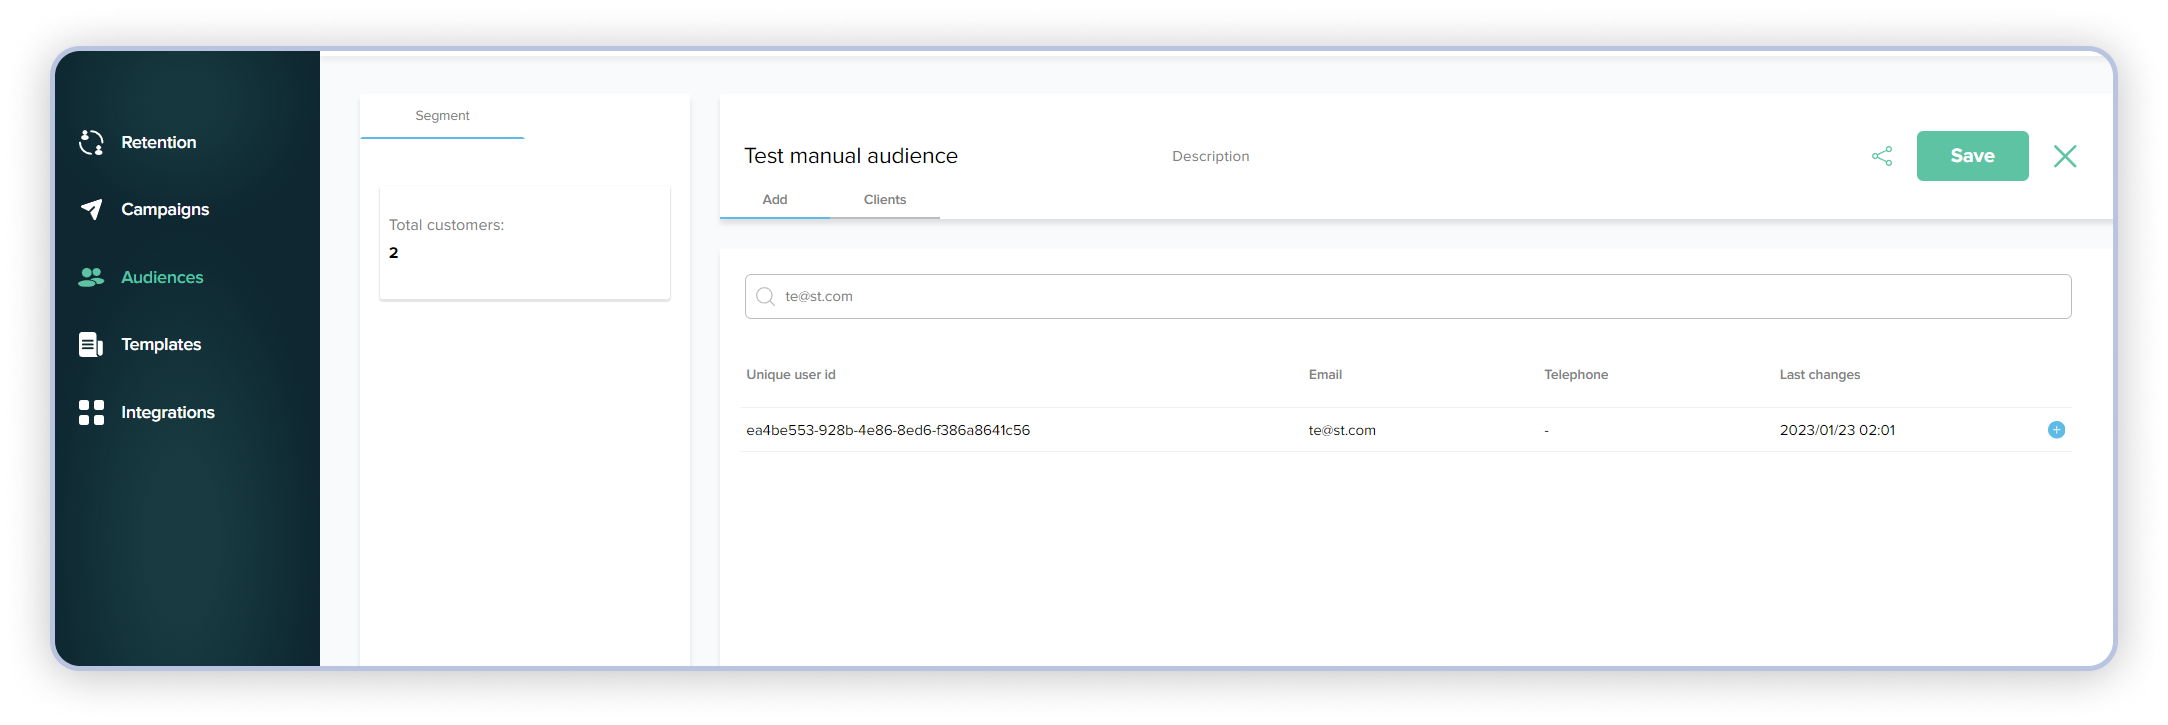
To create a test audience, we will consider creating a "Manual Segment," as it is best suited for creating test audiences.
- In the "Audiences" tab, click the "Create +" button in the bottom right corner, and select "Manual Segment."
- In the search field, enter the phone number, email, or ID of the user you want to add to the test segment.
- After entering the phone number/email or user ID, this user will appear in your list below, and you can add them to the segment using the "+" button.
- Repeat adding users as needed. When all users are added, save the segment by clicking the green "Save" button in the top right corner of the screen.
Your test audience has been created, and now you can proceed to "Step 2" to create a test scenario.
How to create a test scenario:
- In the "Campaigns" tab, click the "Create +" button in the bottom right corner, and select "Create Blank Scenario".
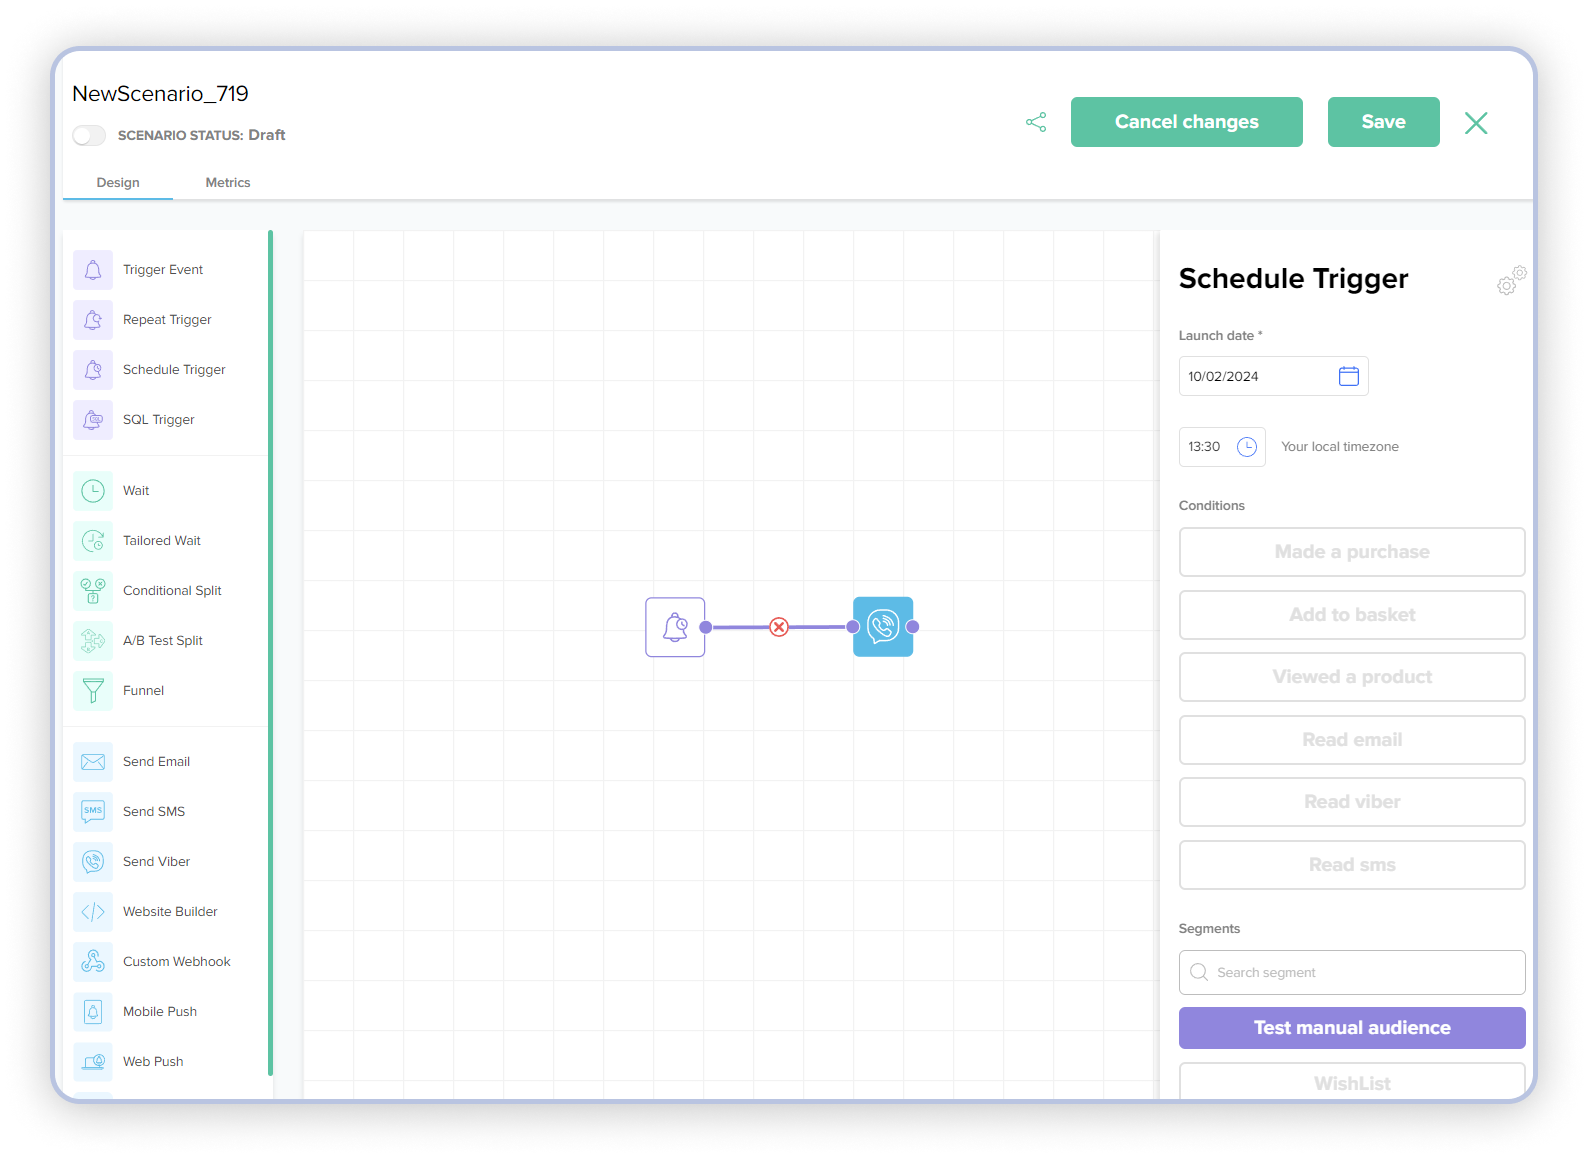
- For testing purposes, the Scheduled Trigger is best suited because it allows us to set the desired date and time of launch. All we need to do in the settings of the Scheduled Trigger is:
- Move the Scheduled Trigger to the scenario field.
- Open the trigger settings (by double-clicking on the trigger icon or right-clicking and selecting "edit").
- In the "Specific time" field, choose the desired launch date.
- In the "Local time" field, specify the desired launch time in your local time.
- In the "Segments" section, select our test segment, which we created at the beginning of our section. Click "Save".
- Choose the communication channel action. In our case, it will be the Viber action.
- Move the Viber communication action to the scenario field.
- Select the general "Communication frequency settings" and internal settings for this scenario: "Maximum number of client sends" and "Within" N number of days.
- Choose a template (how to create a Viber template you can find here).
- Click the "Save" button.
- Combine the Scheduled Trigger and the Viber action, and click the "Save" button in the top right corner of the screen. Slide the switch under the scenario name to the right, and the corresponding "Active" label.
After completing these step-by-step actions, and once you move the scenario switch to the right position and see the label "Active", your test scenario will be activated, and it will start at the time specified by you in the Scheduled Trigger settings.