iOS
Перш ніж розпочати інтеграцію з iOS, переконайтеся, що налаштування Налаштування - Firebase було повністю завершено.
-
Увімкніть функцію Пуш-сповіщення у Додаток > Підписання та можливості > + Можливості > Пуш-сповіщення. Також переконайтеся, що ви надали Ідентифікатор збірки відповідно до вашого профілю забезпечення (перевірте Програми для розробників Apple, якщо у вас його немає).
Примітка
Push-сповіщення доступні з iOS 10 або macOS 10.12 і новіших версій.
-
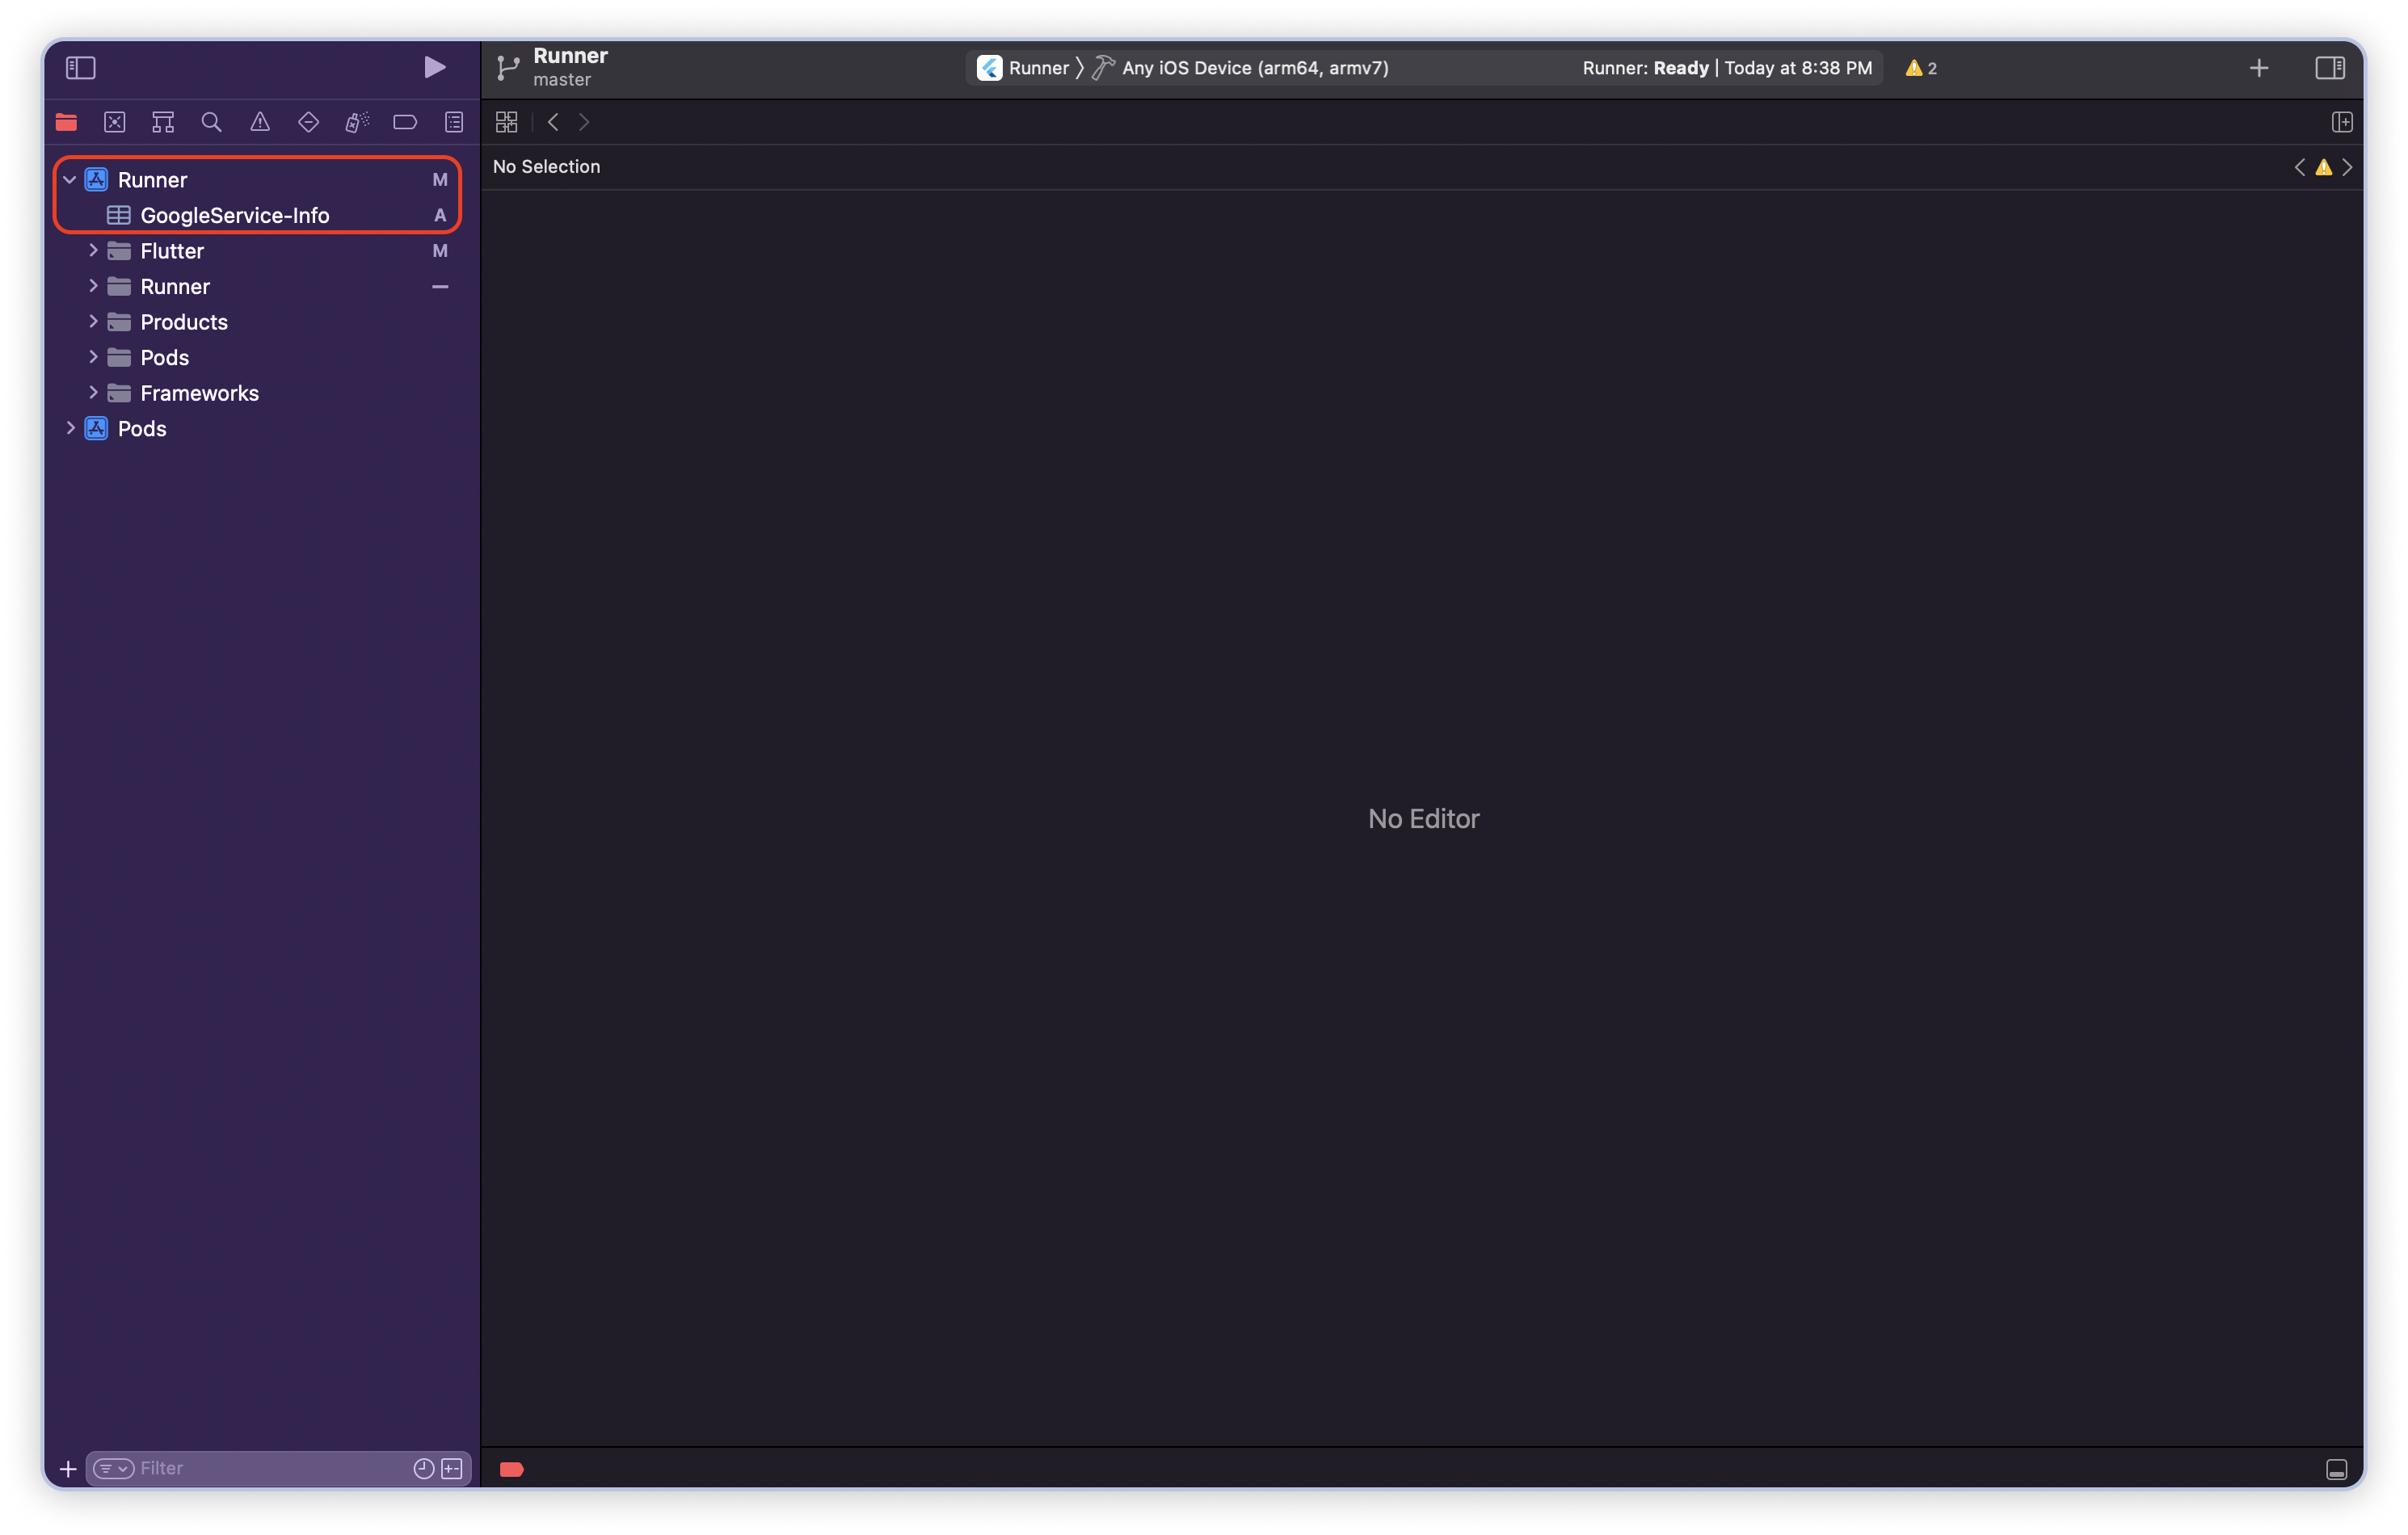
Помістіть
GoogleService-Info.plistпрямо в корінь каталогу, як показано нижче:
-
Додайте CocoaPods до проекту:
- Ініціалізуйте:
pod init -
Додати до
Podfile:pod 'Firebase/Analytics' pod 'Firebase/Messaging'pod 'Firebase/Messaging' -
Встановіть залежності:
pod install - Інтеграція Firebase SDK.
-
Імпортуйте Firebase до вашого
UIApplicationDelegate(AppDelegate):імпортувати Firebase@import Firebase; -
Налаштувати екземпляр Firebase в методі application з параметрами
application:didFinishLaunchingWithOptions:, по суті, цеfunc application( _ application: UIApplication, didFinishLaunchingWithOptions запускOptions: [UIApplication.LaunchOptionsKey: Any]?)з методом:Firebase.configure()[FIRApp configure]; -
Налаштуйте програму на отримання віддалених сповіщень за допомогою
UNUserNotificationCenter:func application( _ application: UIApplication, didFinishLaunchingWithOptions launchOptions: [UIApplication.LaunchOptionsKey: Any]? ) -> Bool { FirebaseApp.configure() Messaging.messaging().delegate = self UNUserNotificationCenter.current().delegate = self нехай authOptions: UNAuthorizationOptions = [.alert, .badge, .sound]. UNUserNotificationCenter.current().requestAuthorization( options: authOptions, completionHandler: { _, _ in } ) application.registerForRemoteNotifications() return true } -
Налаштуйте додаток для отримання токенів пристроїв. Вставте код в
AppDelegate:func messaging(_ messaging: Messaging, didReceiveRegistrationToken fcmToken: String) { // встановлюємо опцію моніторингу регенерації токенів. // встановити опцію для моніторингу регенерації токенів let dataDict: [String: String] = ["token": fcmToken]. NotificationCenter.default.post( name: Notification.Name("FCMToken"), object: nil, userInfo: dataDict ) // надсилаємо запит до методу NeuCurrent для реєстрації токену згідно з інтерфейсом NeuCurrent API Swagger UI }
Відправлення запиту за допомогою NeuCurrent API
Зверніть увагу, що в коді потрібно відправити HTTP-запит до NeuCurrent API з отриманим токеном пристрою на
https://app.neucurrent.com/push/api/v1/device-token/add. Документи:https://app.neucurrent.com/push/api/v1/docs. - Ініціалізуйте:
-
Додати можливість отримання зображення:
- Додайте нову ціль: Файл > Новий > Ціль > Розширення служби сповіщень.
- Додати до
Підфайлу:target 'YourNotificationServiceExtensionTargetName' do pod 'Firebase/Messaging' кінець- Змініть файл
NotificationService.swift, як показано нижче:NotificationService.swift1 2 3 4 5 6 7 8 9 10 11 12 13 14 15 16 17 18 19 20 21 22 23 24 25
import UserNotifications
import FirebaseMessaging

class NotificationService: UNNotificationServiceExtension {

    var contentHandler: ((UNNotificationContent) -> Void)?
    var bestAttemptContent: UNMutableNotificationContent?

    перевизначити функцію didReceive(_запит: UNNotificationRequest, withContentHandler contentHandler: @escaping (UNNotificationContent) -> Void) { })
        self.contentHandler = contentHandler
        bestAttemptContent = request.content.mutableCopy() as? UNMutableNotificationContent
        guard let bestAttemptContent = bestAttemptContent else { return }
        FIRMessagingExtensionHelper().populateNotificationContent(bestAttemptContent, withContentHandler: contentHandler)

    }

    override function serviceExtensionTimeWillExpire() { // Викликається безпосередньо перед закінченням терміну дії продовження
        // Викликається безпосередньо перед тим, як розширення буде завершено системою.
        // Використовуйте це як можливість доставити вашу "найкращу спробу" модифікованого контенту, інакше буде використано оригінальне корисне навантаження push.
        if let contentHandler = contentHandler, let bestAttemptContent = bestAttemptContent {
            contentHandler(bestAttemptContent)
        }
    }

}
- Змініть файл
-
Вітаю вас! Ви завершили процес інтеграції. Повний приклад:
AppDelegate.swift1 2 3 4 5 6 7 8 9 10 11 12 13 14 15 16 17 18 19 20 21 22 23 24 25 26 27 28 29 30 31 32 33 34 35
import UIKit
import Firebase

@available(iOS 10.0, *)
@UIApplicationMain
class AppDelegate: UIResponder, UIApplicationDelegate, UNUserNotificationCenterDelegate, MessagingDelegate { {\i1
  func application(
    _ application: UIApplication,
    didFinishLaunchingWithOptions launchOptions: [UIApplication.LaunchOptionsKey: Any]?
  ) -> Bool {
    FirebaseApp.configure()
    Messaging.messaging().delegate = self
    UNUserNotificationCenter.current().delegate = self

    нехай authOptions: UNAuthorizationOptions = [.alert, .badge, .sound].
    UNUserNotificationCenter.current().requestAuthorization(
      options: authOptions,
      completionHandler: { _, _ in }
    )

    application.registerForRemoteNotifications()
    return true
  }

  func messaging(_ messaging: Messaging, didReceiveRegistrationToken fcmToken: String) { } }
    // встановити опцію для моніторингу регенерації токенів
    let dataDict: [String: String] = ["token": fcmToken].
    NotificationCenter.default.post(
      name: Notification.Name("FCMToken"),
      object: nil,
      userInfo: dataDict
    )
     // надсилаємо запит до методу NeuCurrent для реєстрації токену згідно зі Swagger UI
  }
}
Додаткові джерела: