Simple scenarios
An example of the most common scenario is sending a regular message to a customer or a group of customers (email / Viber / web push, etc). For instance, we need to inform the customer that on a specific day/week, they will be able to purchase a certain product with a discount.
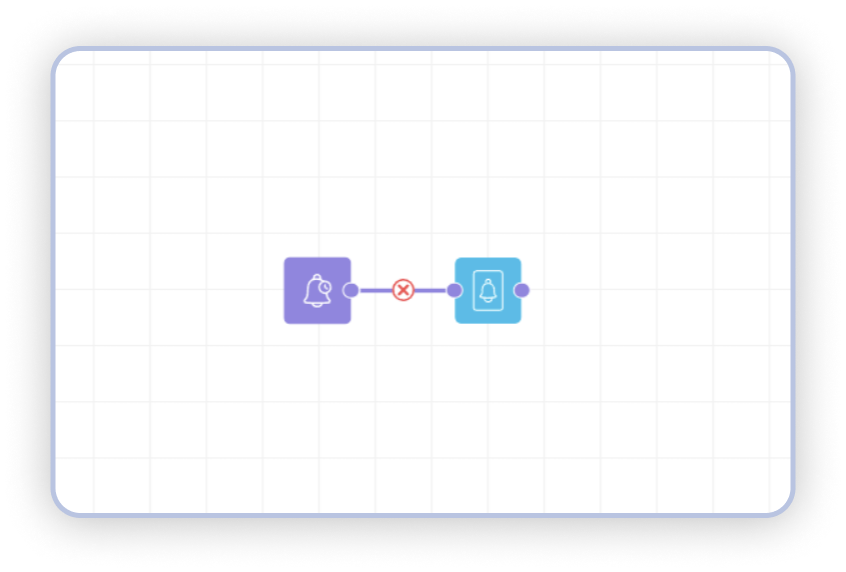
For scheduled one-time dispatches, we can utilize the Scheduled Trigger.
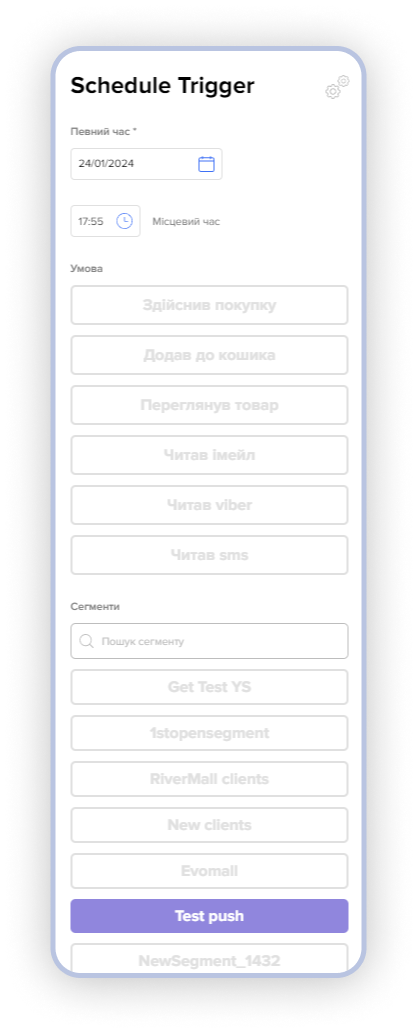
In our case, we activate the scheduled trigger with simple settings (only date and time) and for a specific segment (the Test Push segment) that we are interested in.
Note
If no segment is selected, the scenario will be triggered for all clients in the database.
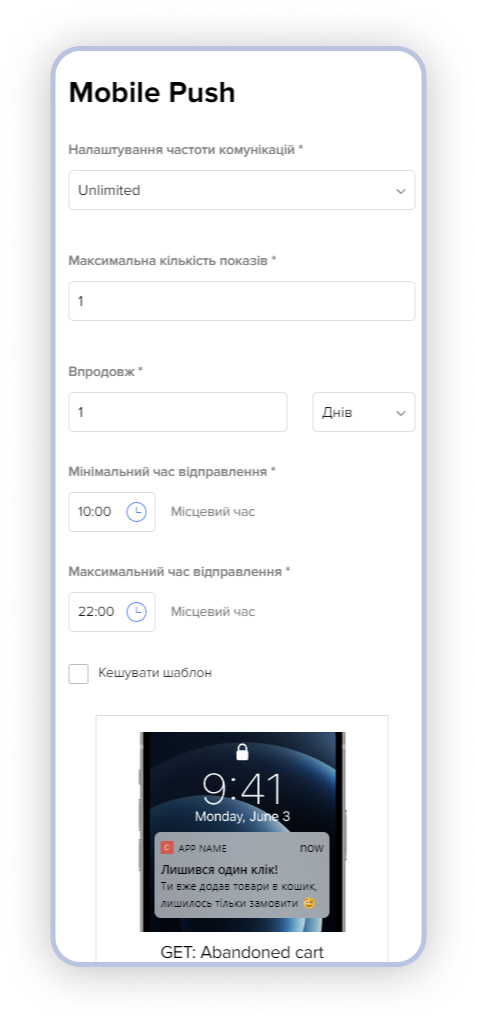
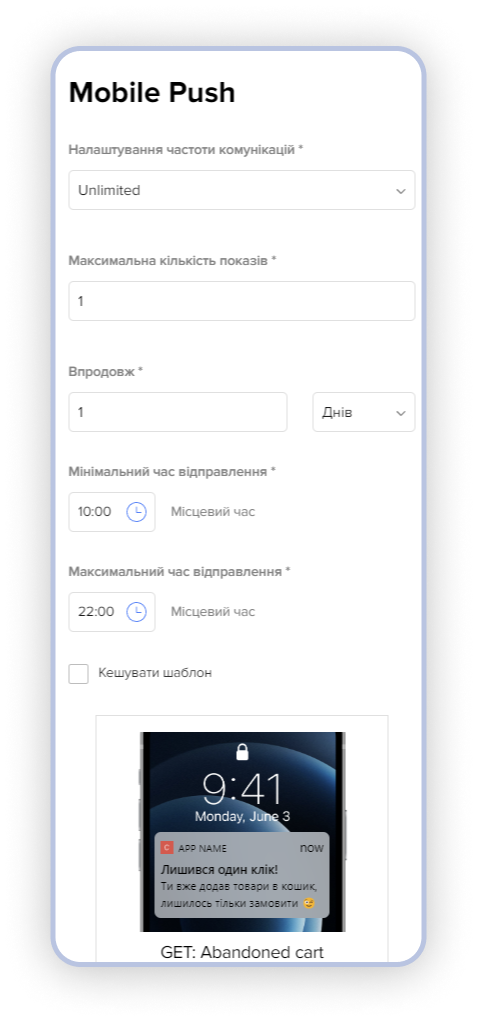
In the settings of the required communication method (in this case, it is mobile notification), we choose the necessary template for sending and specify the notification frequency as 1 time per day (meaning that according to this scenario, the client cannot receive notifications more than once within 24 hours from the previous communication based on this scenario).
After configuring the scenario conditions (scheduled trigger) and selecting the template, we can proceed to launch the scenario. To do this, press the 'Save' button in the top right corner of the screen and move the Scenario Status slider to the right (the slider will be marked in green with the label 'Active').
This way, we have set up the simplest scenario, and your message will be sent to clients at the scheduled time.
In this case, let's examine the scenario that responds to the successful order placement and sends a notification to the customer about it. This scenario looks as follows:
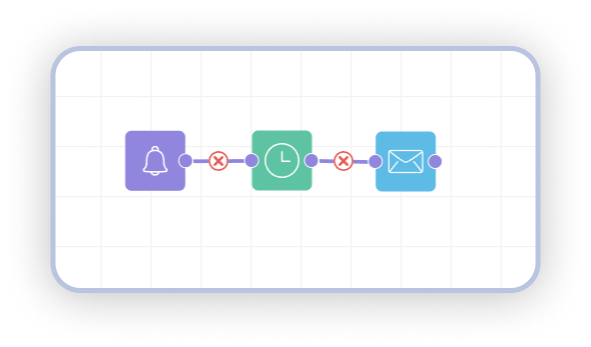
The scenario logic consists of:
1. Trigger Event (a trigger linked to a specific event, for example, order placement, adding a product to the cart, or simply viewing a product).
2. Waiting for 5 minutes after a successful purchase - this wait is designed to avoid being intrusive to the customer in situations where it is not necessary. For instance, if a customer just views a product without making a purchase, and to avoid sending them a message at that moment, we can introduce a delay, say, for 60 minutes.
3. Communication channel. In our case, the notification about a successful purchase will be sent via email, which is mandatory during the purchase, ensuring that the customer will receive the message.
Here is how the settings of the trigger look:
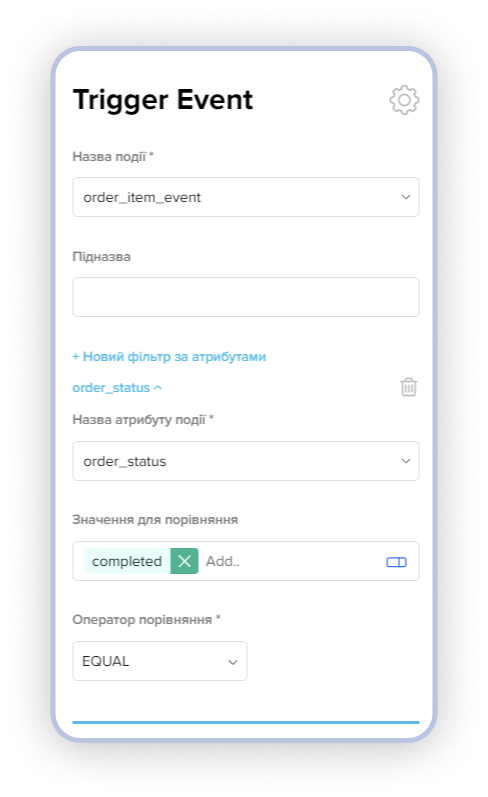
- Event Name: order_item_event - meaning our trigger will respond to an event related to a product.
- Event Attribute Name: order_status - checking at which stage the order is.
- Values for comparison and its operator: completed - a completed order at all its stages (order creation, data filling, payment). EQUAL - it checks for the value completed specifically (looking for a completed order).
In simple terms, the logic of this trigger is as follows: if we have an event for one of the items (order_item_event) that is at the status (order_status) of successful completion (completed), then the next chain in the scenario is triggered.
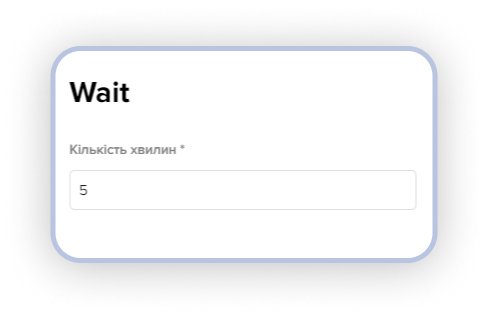
Waiting Trigger: in our case, it was decided that it's better to notify the customer about a successful purchase via email 5 minutes after the order is placed.
Communication Trigger: Since it is mandatory to provide an email for the successful completion of an order on this website, the notification of a successful purchase is sent specifically to this email. We can be confident that the customer will receive the necessary message.
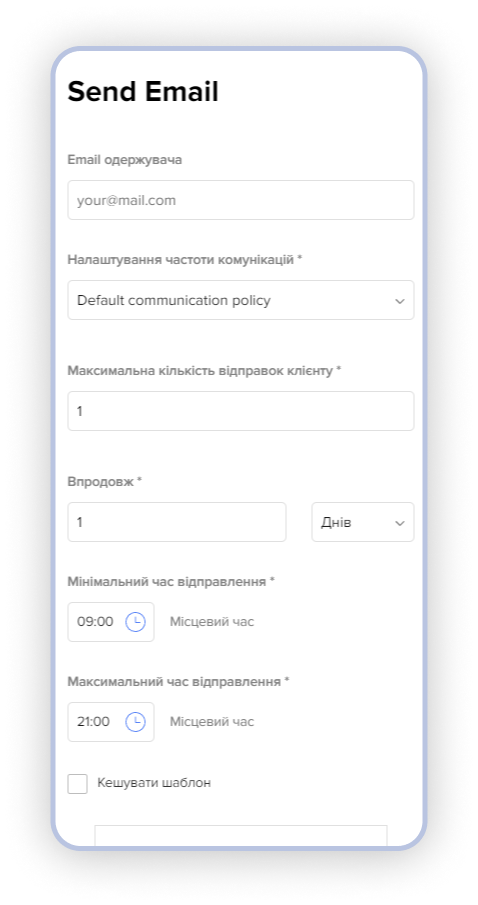
- Recipient's Email: empty field, as the system will automatically fill in the customer's email for whom this scenario will trigger.
Note
This field needs to be filled in only when we want to send communication to a specific customer, or if we want to test sending to our own email by providing our email address.
-
Communication Frequency Settings: in this field, we select one of the previously configured (or default) communication frequencies, such as
-
"Max number of messages to a client" and "Within": usually, these values are populated as the chosen communication frequency in the "Communication Frequency Settings." These fields were implemented so that during testing (when we want to send ourselves 5-10-15 test emails), we don't alter these values in the main communication frequency, and then we don't need to change them again when sending an email to a customer.
Note
These settings, "Max number of messages to a client" and "Within," are relevant only in the scenario where they differ from the general communication frequency, so as mentioned earlier, these fields are ideal for testing.
- "Minimum send time" and "Maximum send time" - limitations on the local time during which the communication will be sent.
After configuring the scenario and selecting the template, we can proceed to launch the scenario. To do this, press the 'Save' button in the top right corner of the screen and move the Scenario Status slider to the right (the slider will be marked in green with the label 'Active').
In this example, let's analyze a scenario where a customer added items to the cart in the mobile application but did not complete the purchase. Visually, the scenario logic looks like this:
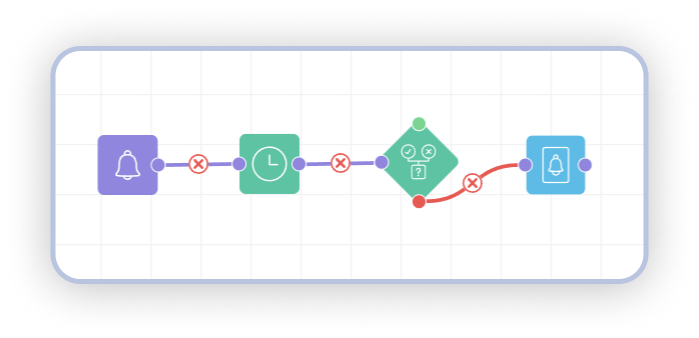
Let's analyze this scenario in more detail:
- A trigger that responds to the addition of any item to the cart.
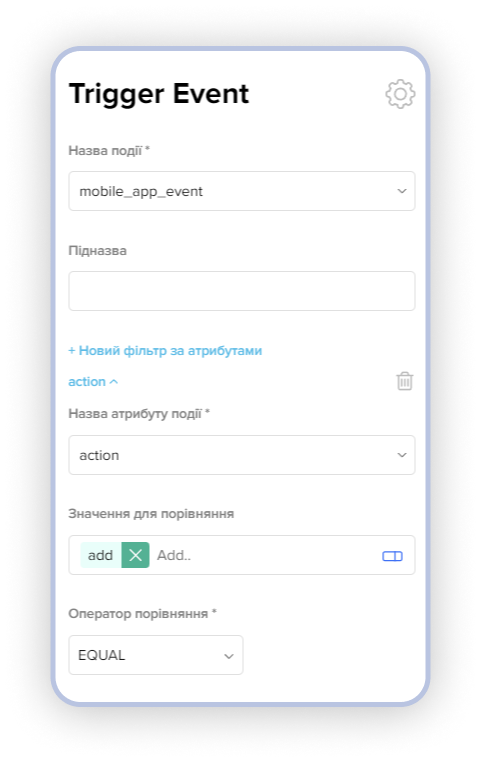
Event Name: 'mobile_app_event' - the trigger will respond to an event that occurred in the mobile application.
Event Attribute Name: 'action - add' - in this case, adding to the cart is checked for the 'action' event of adding an item to the cart with the attribute 'add.'
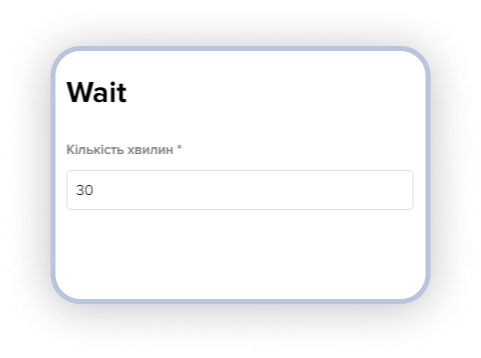
- Waiting Timer for 30 minutes to avoid notifying the customer about an unfinished purchase immediately after adding the item to the cart.
- Condition split - checking whether the purchase has been completed and additional actions with the cart (for example, removing items from the cart).
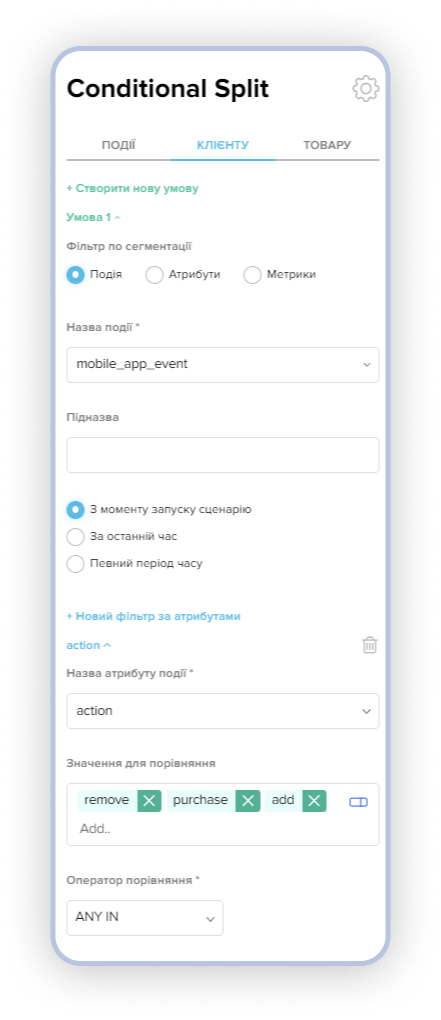
We perform the check in the 'Client' tab, meaning the event for each individual client.
Event Name: 'mobile_app_event' - an event in the mobile application. 'From the moment of scenario launch' - responds to the moment of the user's first trigger, adding a product to the cart.
The event attribute name and values for comparison - the attribute 'action' in our case corresponds to any actions related to the cart. The values for comparison 'remove,' 'purchase,' and 'add' correspond to removing from the cart (remove), completing the purchase (purchase), and adding another item (add).
In other words, if a product was added and there were no other actions in the cart (adding another item, completing the purchase, or removing the item), we get a 'abandoned cart,' which is what we need in this scenario.
- When we receive the 'abandoned cart' result that passed the check in step #3, we send the customer a push notification to their mobile application, reminding them of the product they previously added to the cart.
