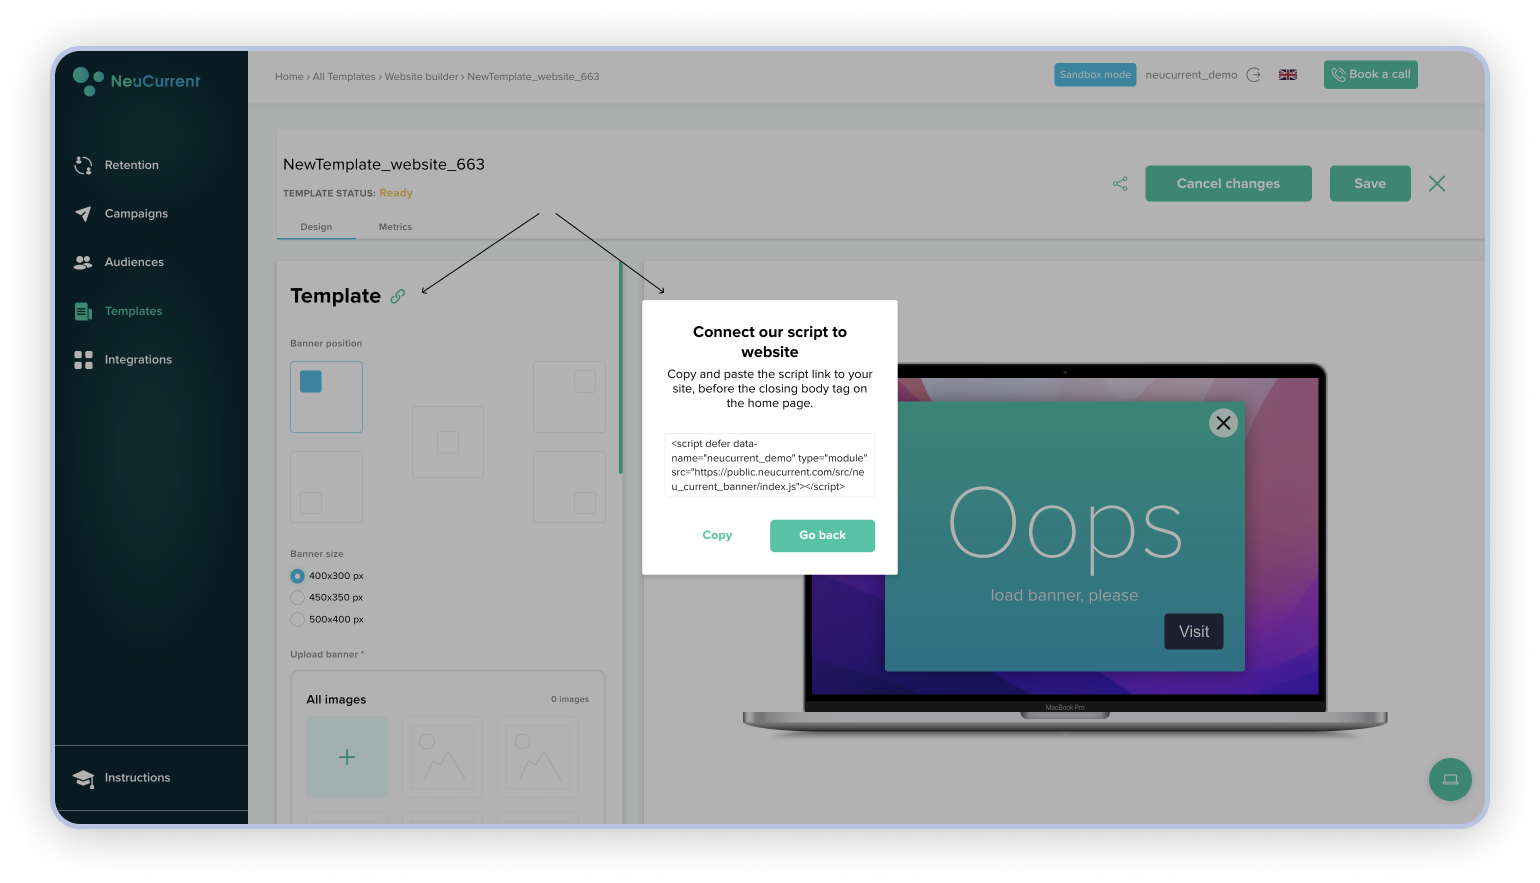
Create and edit banner template
Selecting a banner from the list of templates
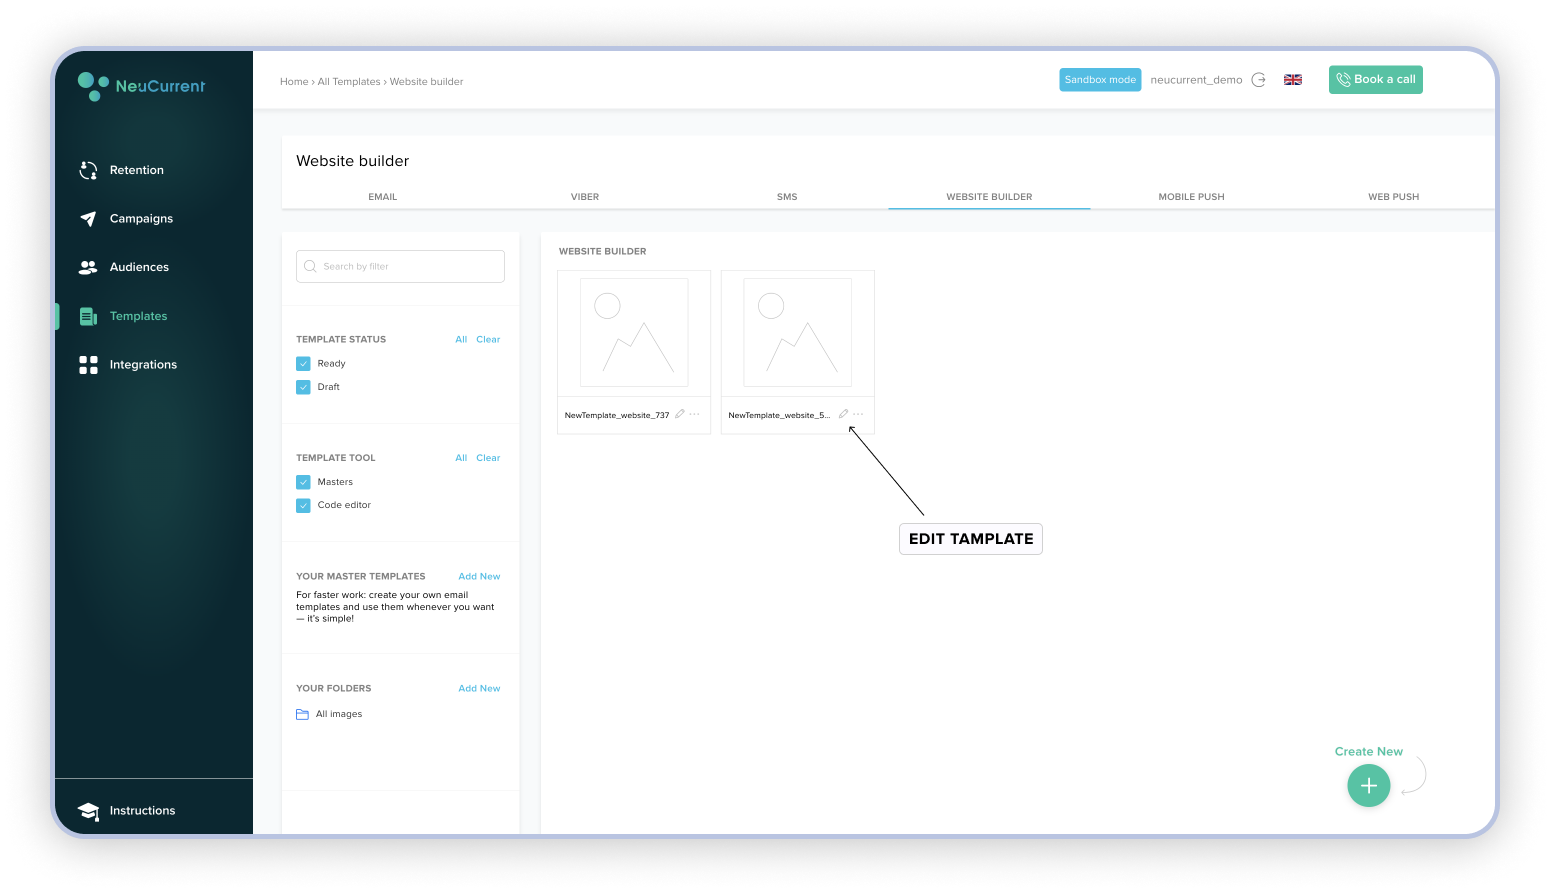
There are two ways to access the template editing menu:
- Go to the "Templates" section in the navigation menu on the left
- Switch the template tab to "Website Builder" as shown in the image
- Choose to edit an existing banner or create a new one.
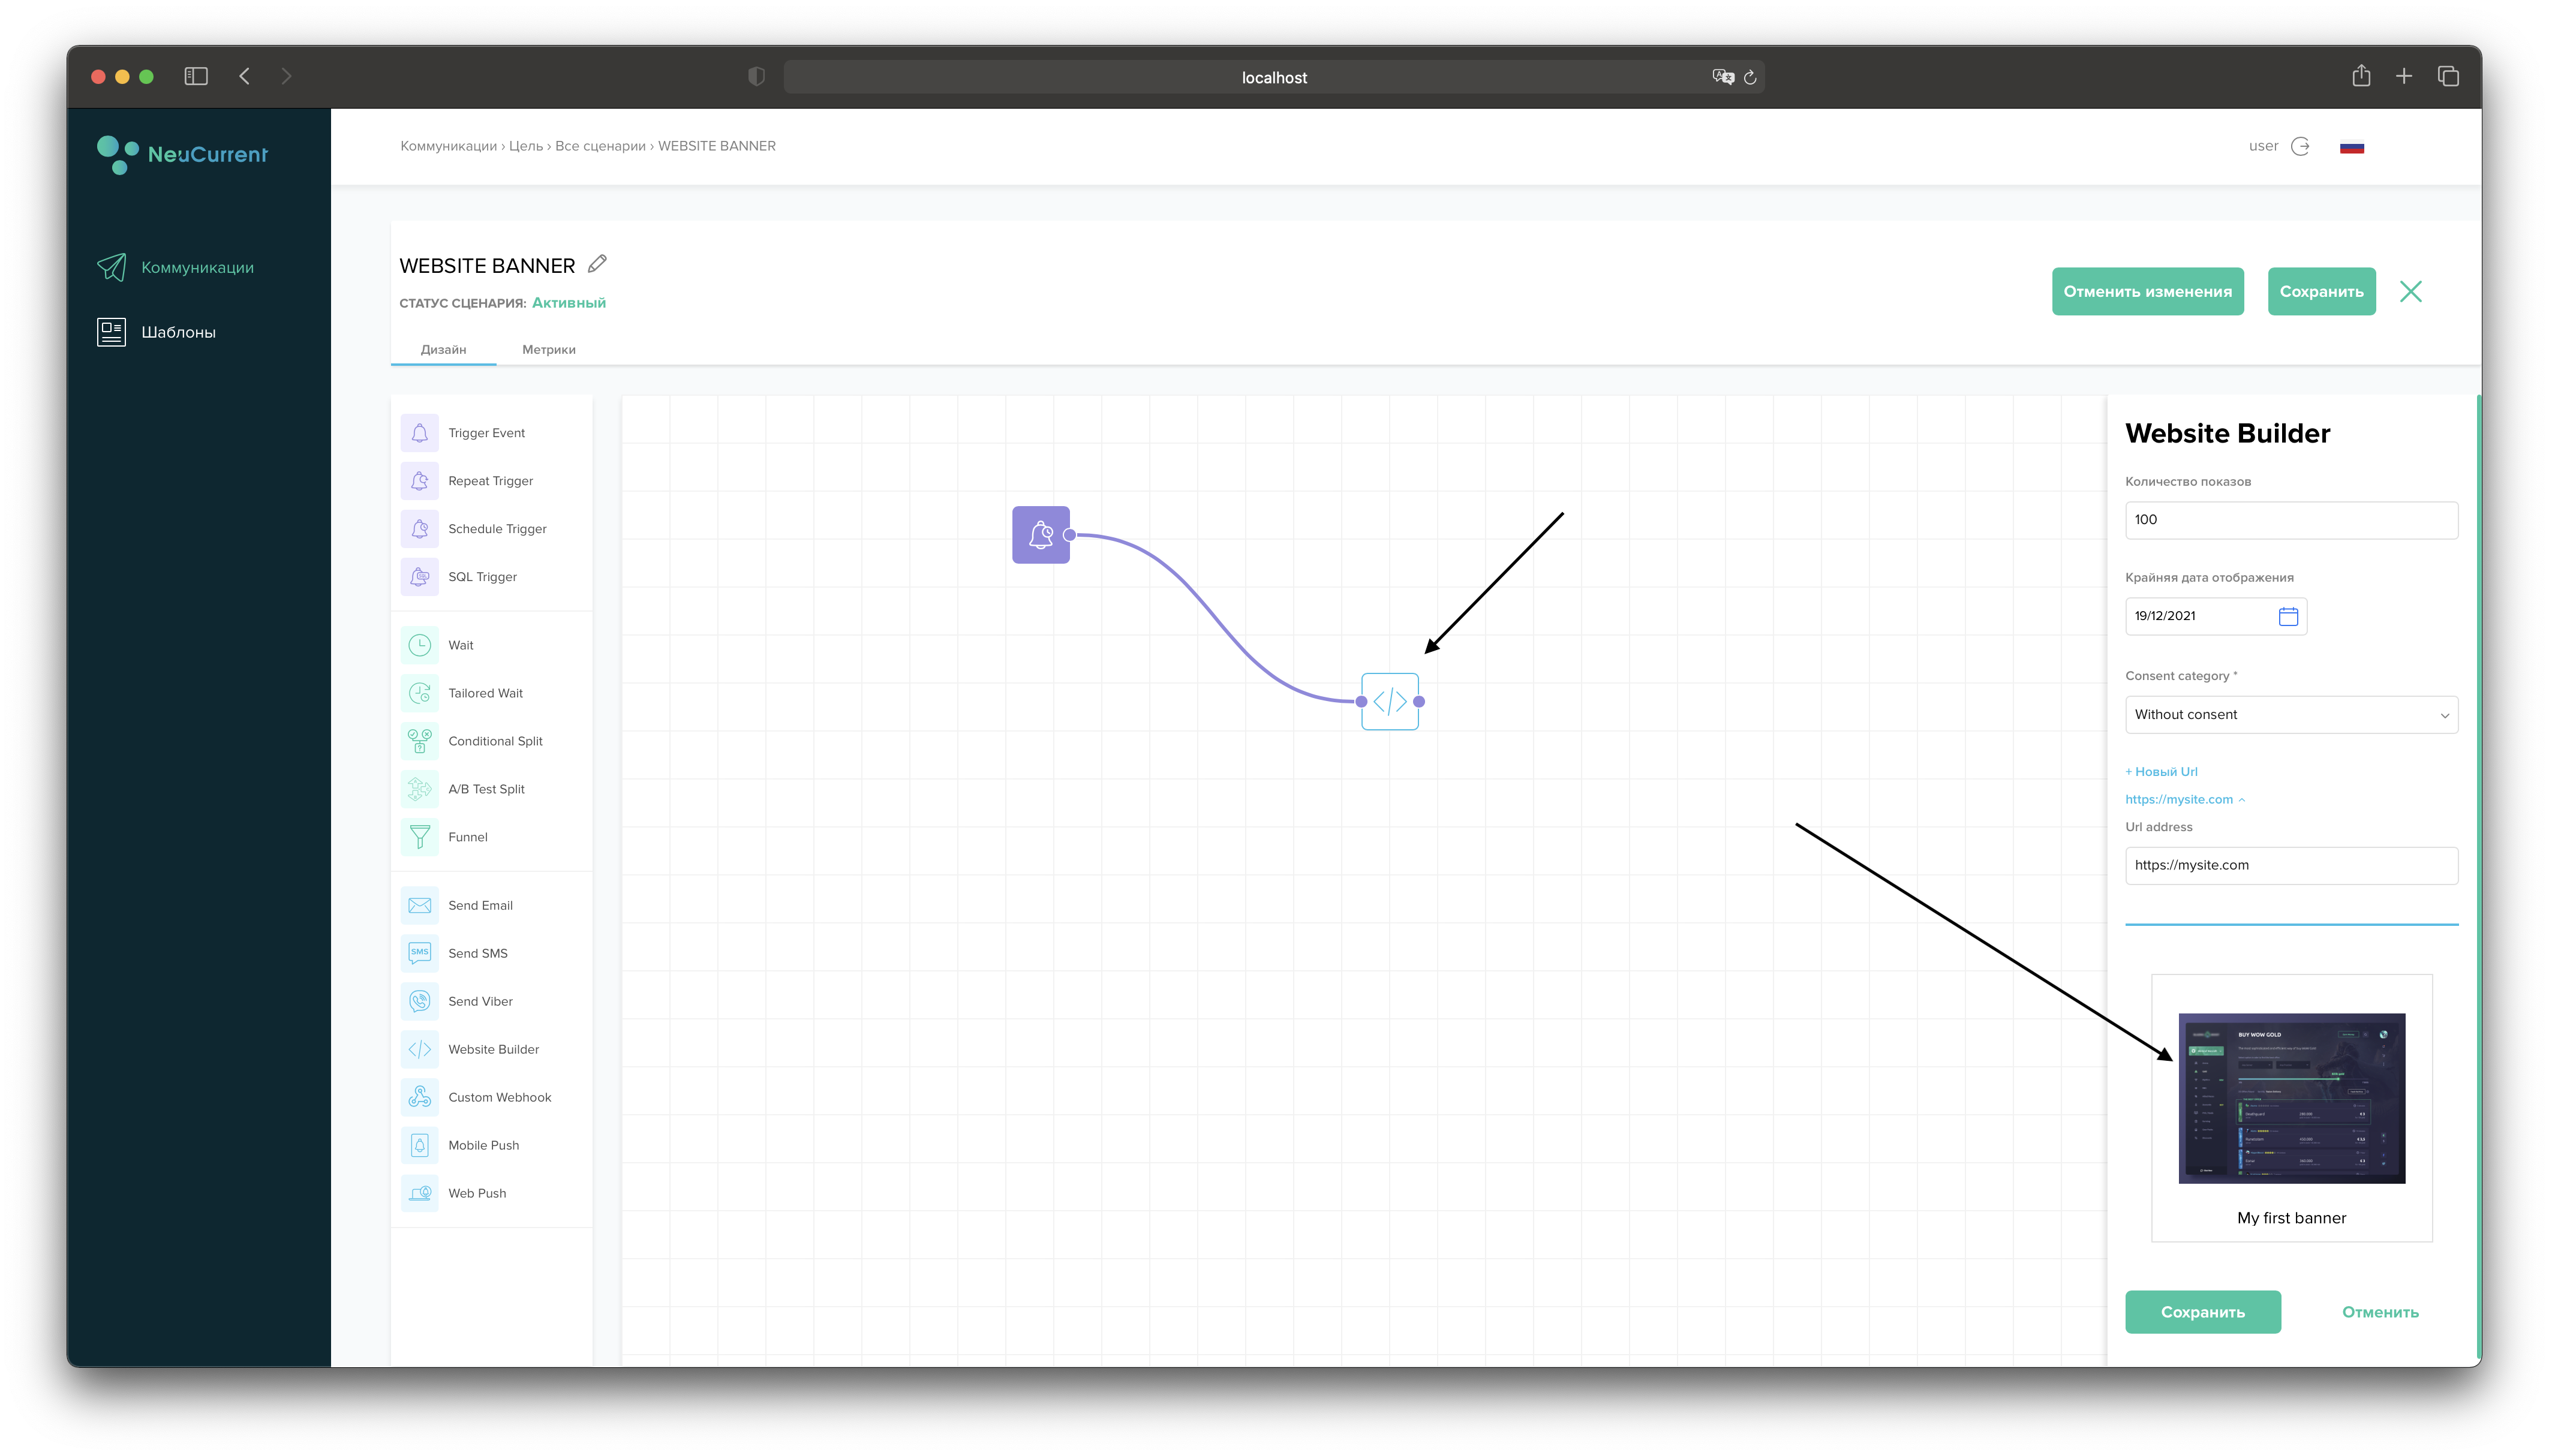
- In the edit script page, right-click on the Website Builder Action and select "Edit"
- This will open an editing section for the selected Action. At the very bottom click on "Add Template".
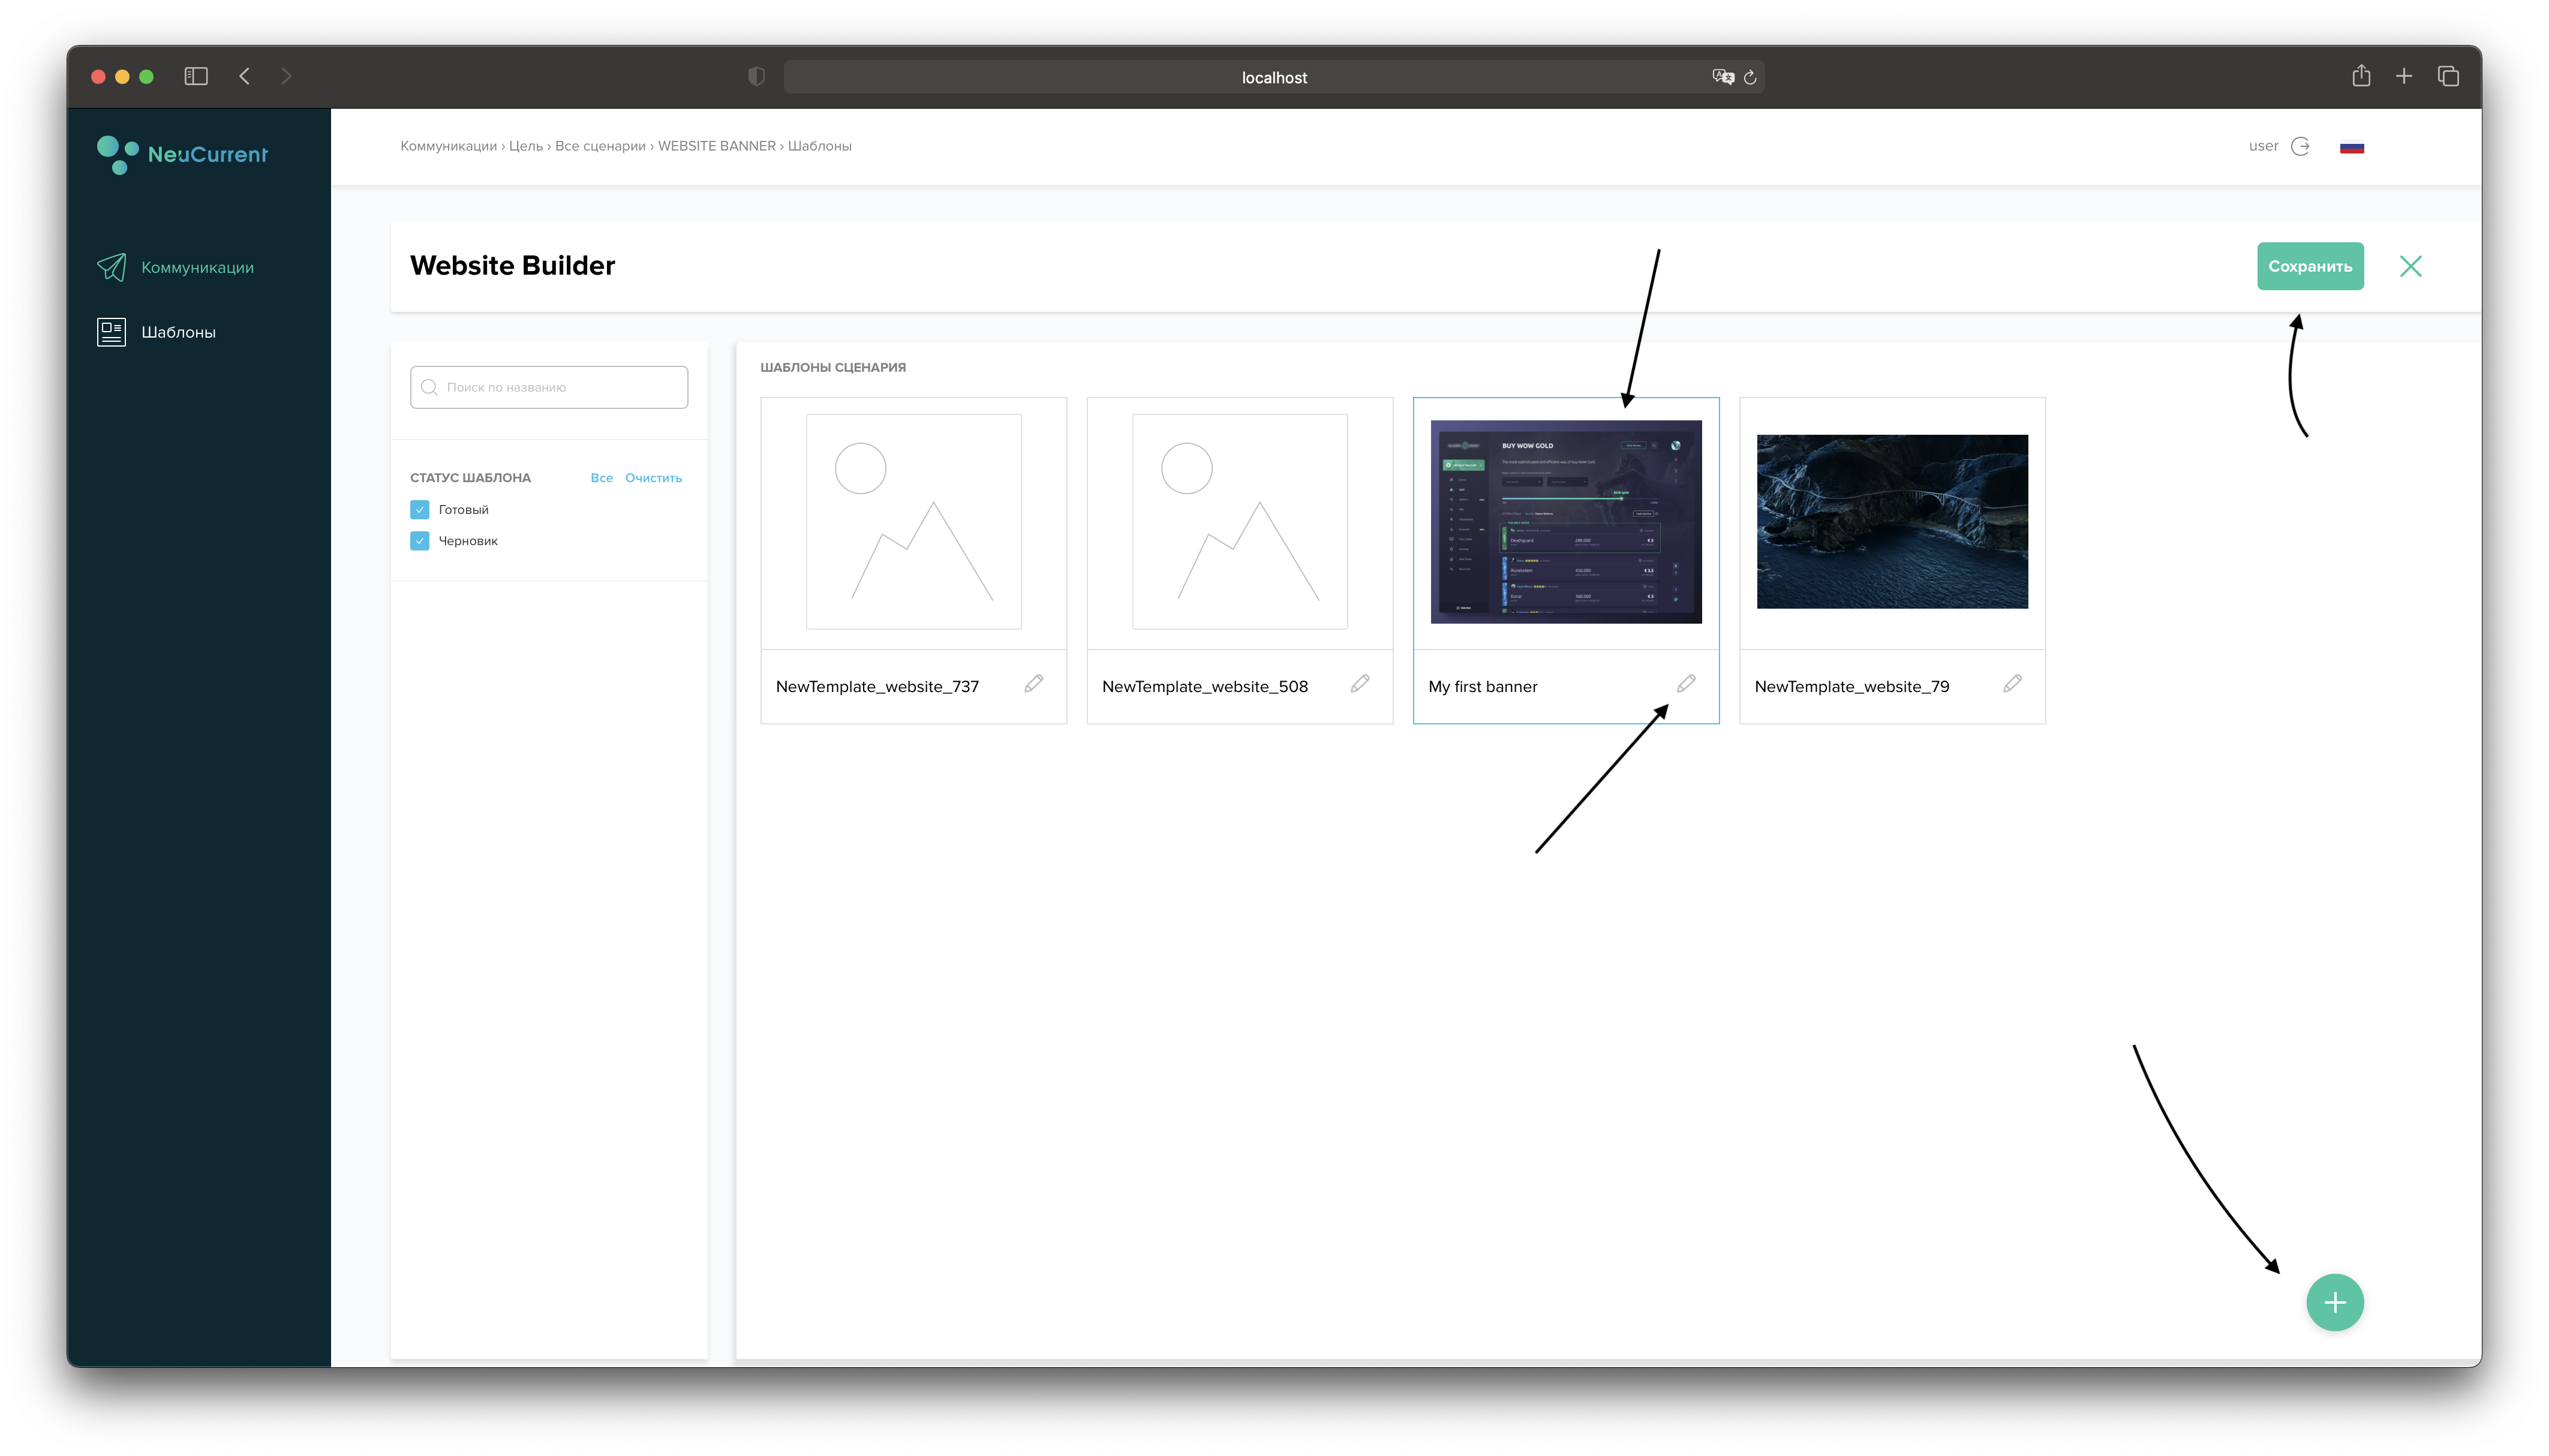
- You will be redirected to the banner template selection page
- Choose an existing template from the list by clicking on it with the left mouse button or create a new one
- After selecting the banner template press the "Save" button to link the current Action to the selected template
Web banner template configuration window
If you are creating a new banner template, or have chosen to edit an existing one, you will be redirected to the edit banner template page... so, let's get started.
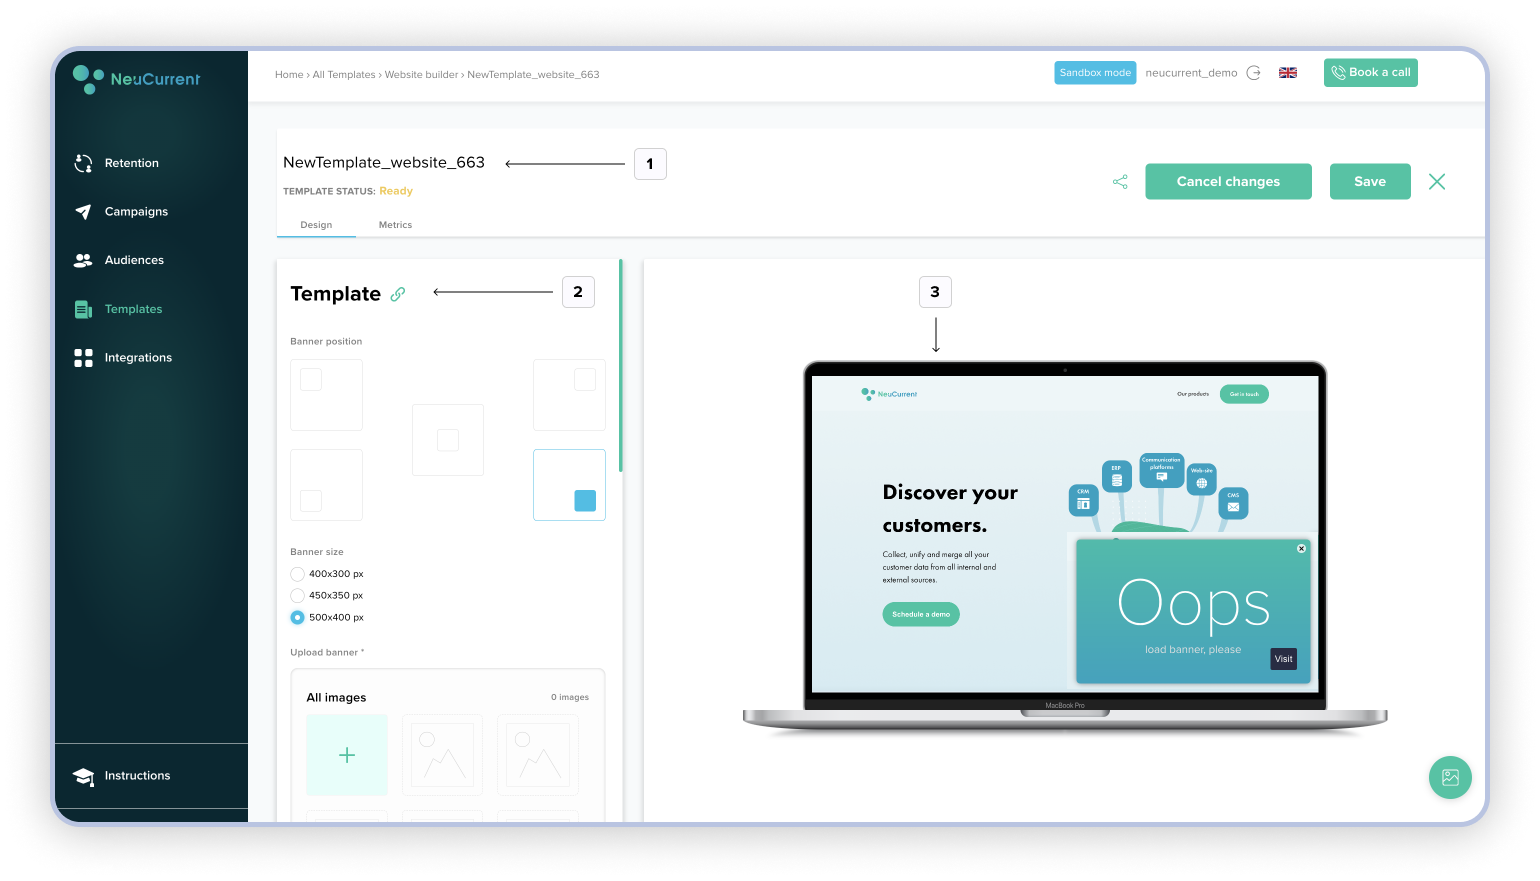
The picture above shows the main sections we will be working with next:
- Editing template name
- Section with the banner settings
- Banner display section based on the current settings
- Buttons to switch between the Picture Library and the Preview Banner section
Below we will look at all of these items in more detail:
Note
You can create two types of web banners in our platform:
- Standard banner - where clicking on the "Go" button will redirect the user to the specified address
- feedback banner - exactly the same banner with one significant difference. Clicking the "Go To" button opens a window with a feedback form. Where the user can leave his contact details
Banner positioning and size
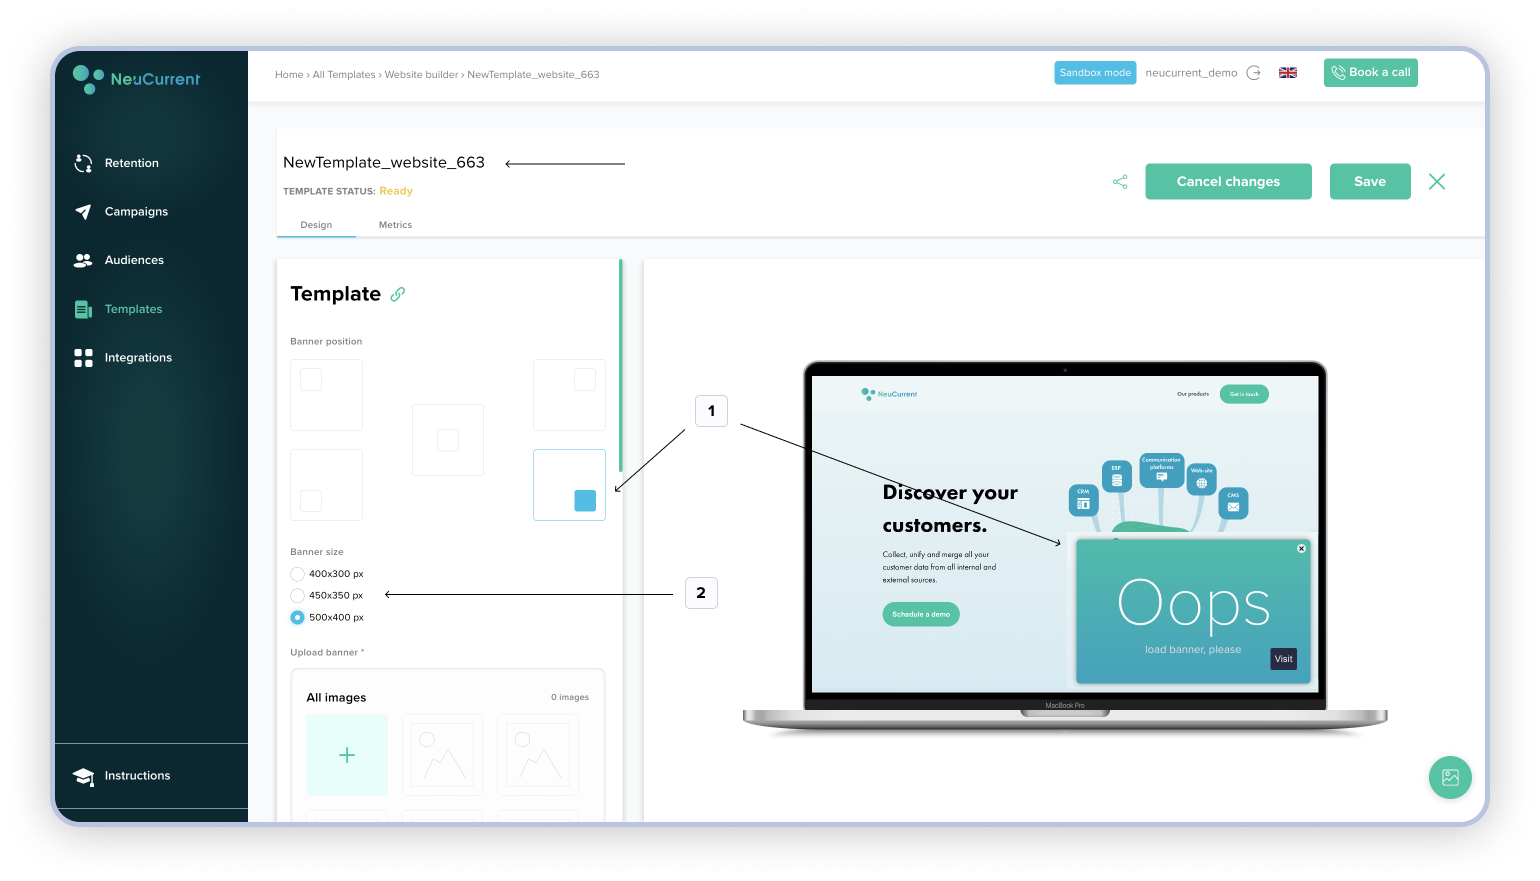
- First select the banner positioning relative to the screen. By changing the positioning, you will be able to observe the changes on the right side of the preview. It includes an animation of the banner's appearance on the user's screen.
- Select the banner size in pixels that is available and suitable for you.
Adding an image to the banner
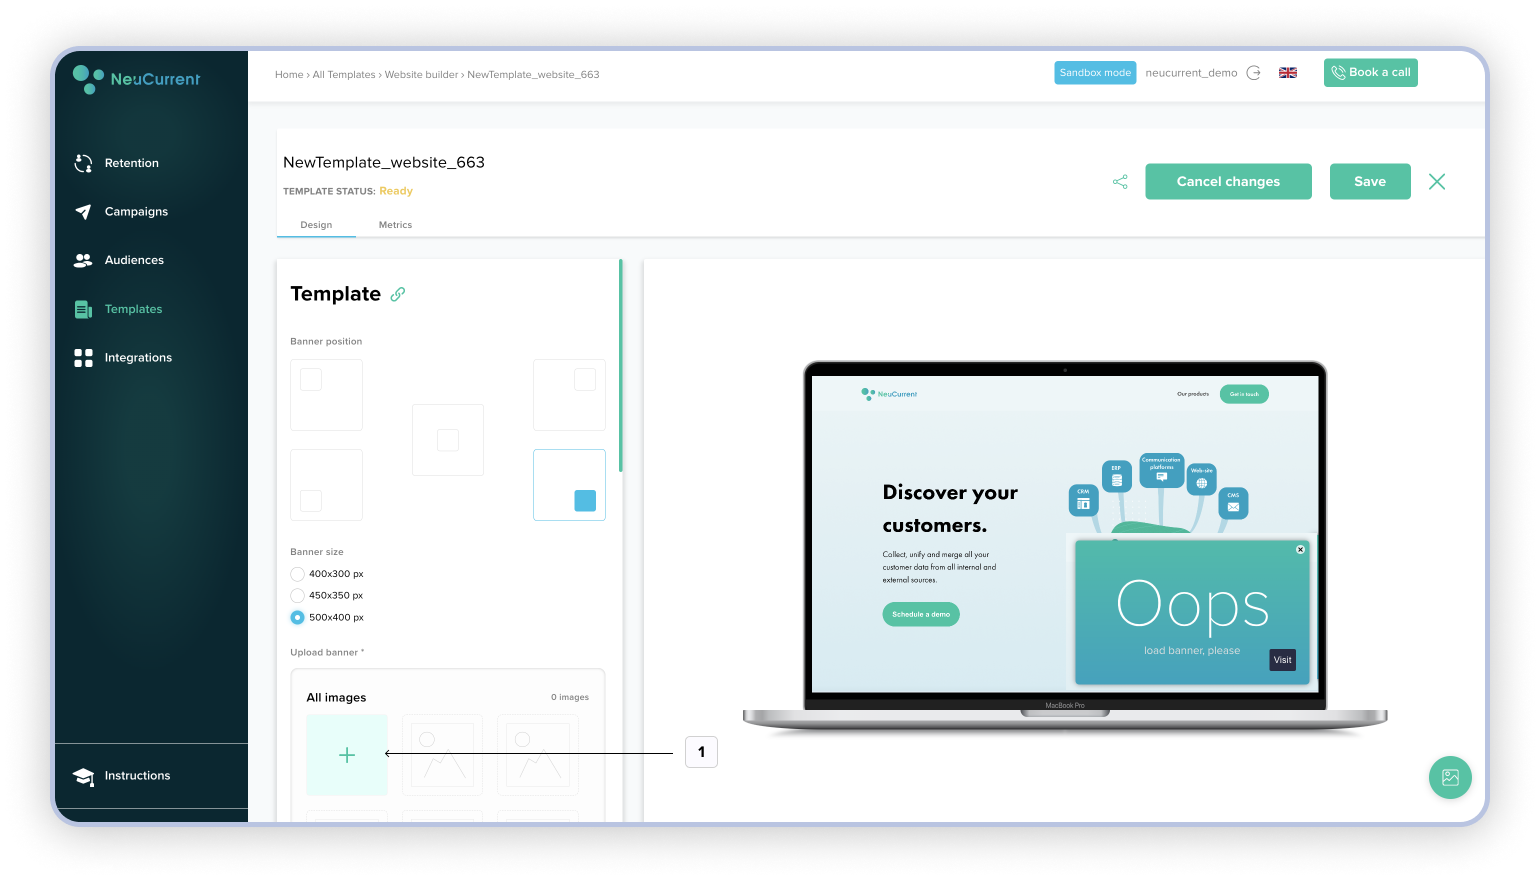
- Click on "upload image" and select an image on your computer.
- If you already have the image in your library, click on the button to switch screens (in the bottom right corner) and you will be taken to the section where all available images are stored.
- Select the appropriate creative by left clicking on it. Then go back to the banner preview and you will see its updated state.
Select banner type
Note
As written before, there are two banner types: "Standard" and "Feedback Banner". Switching between banner types depends on the type of fields to be filled in. If at least one fillable field is selected, the banner will work as a 'Feedback Banner'. To use the standard banner, disable all fields that you want to be filled in.
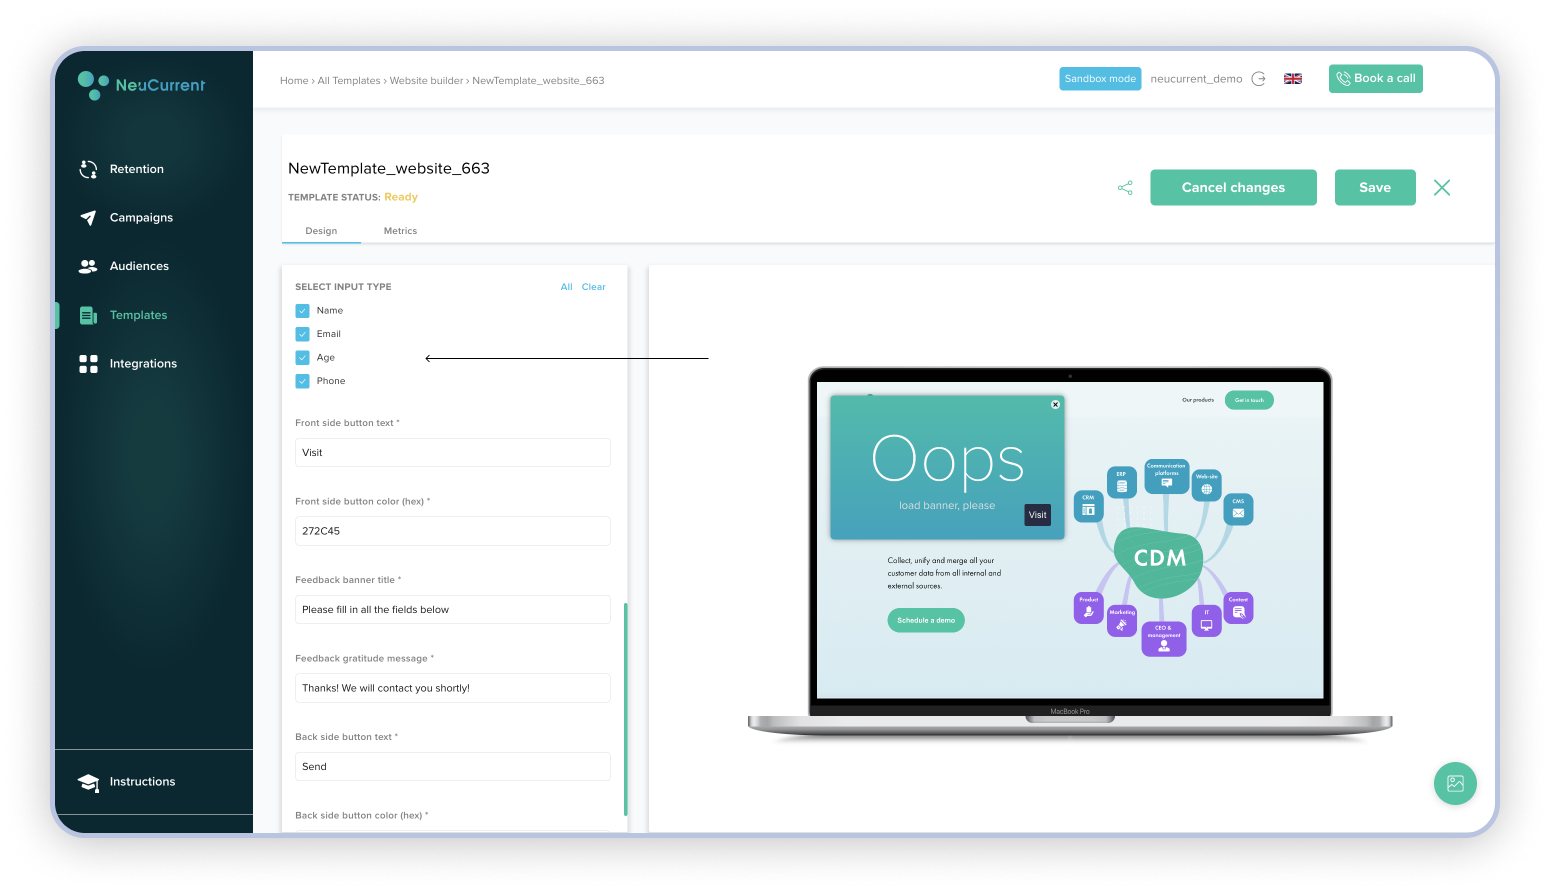
Next we'll look at the types of fields you can enter:
- name - used for username.
- Mail - field for email address.
- Age - used to collect information about the age of the user being registered.
- Phone number - used for contact phone number.
Banner settings
Note
Switch to full size banner view by pressing the button in the bottom right corner of the screen. As shown in the picture.

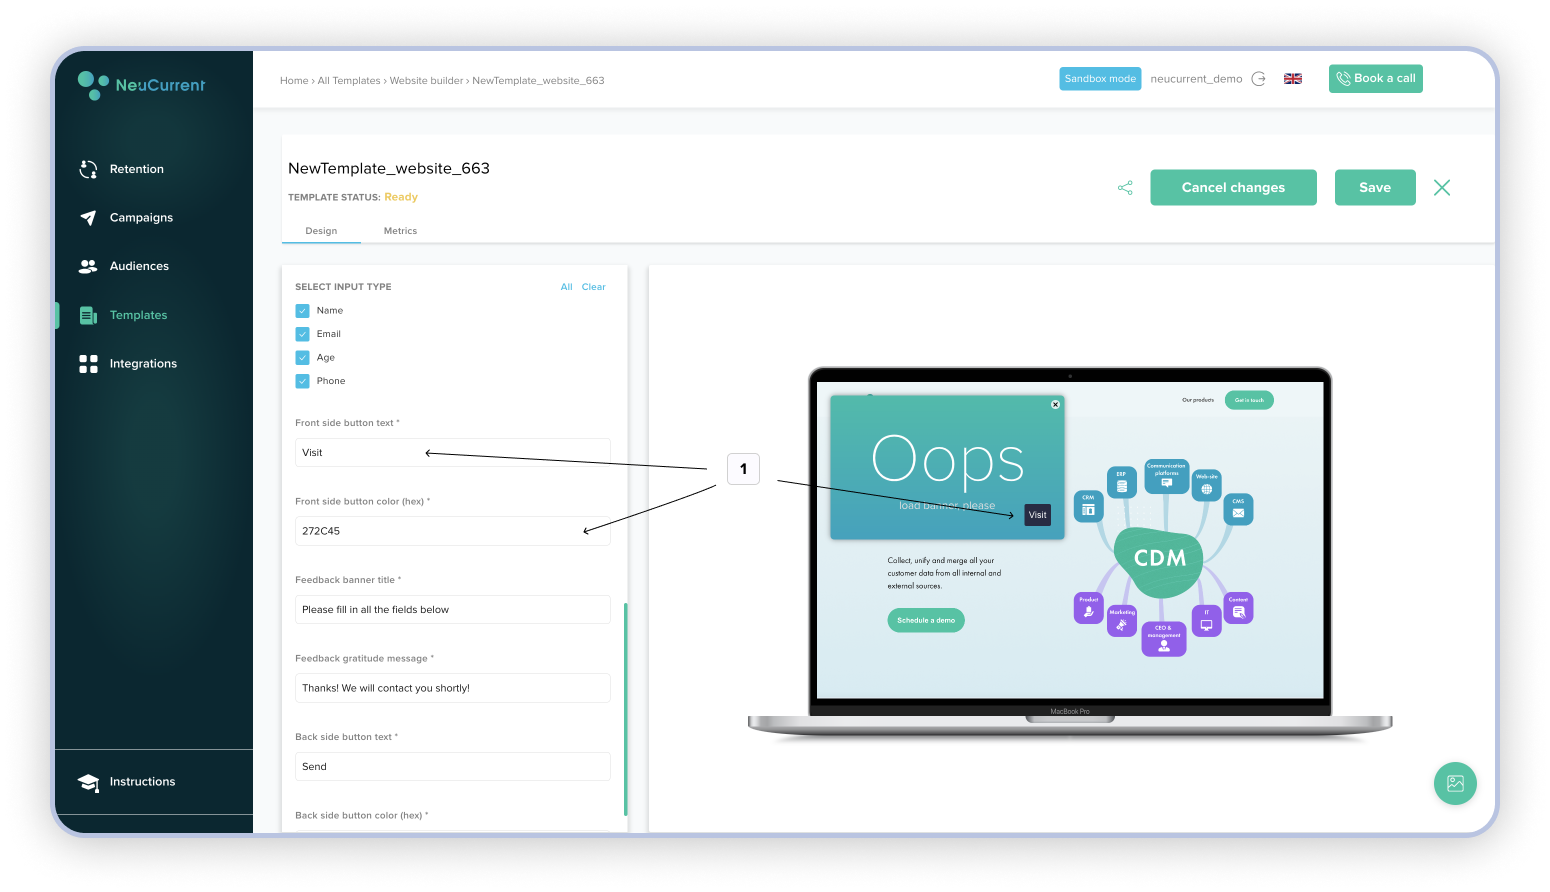
- You can choose the colour and text for the button. Colour is specified in HEX format (For example: #FFFFFFFF - white)
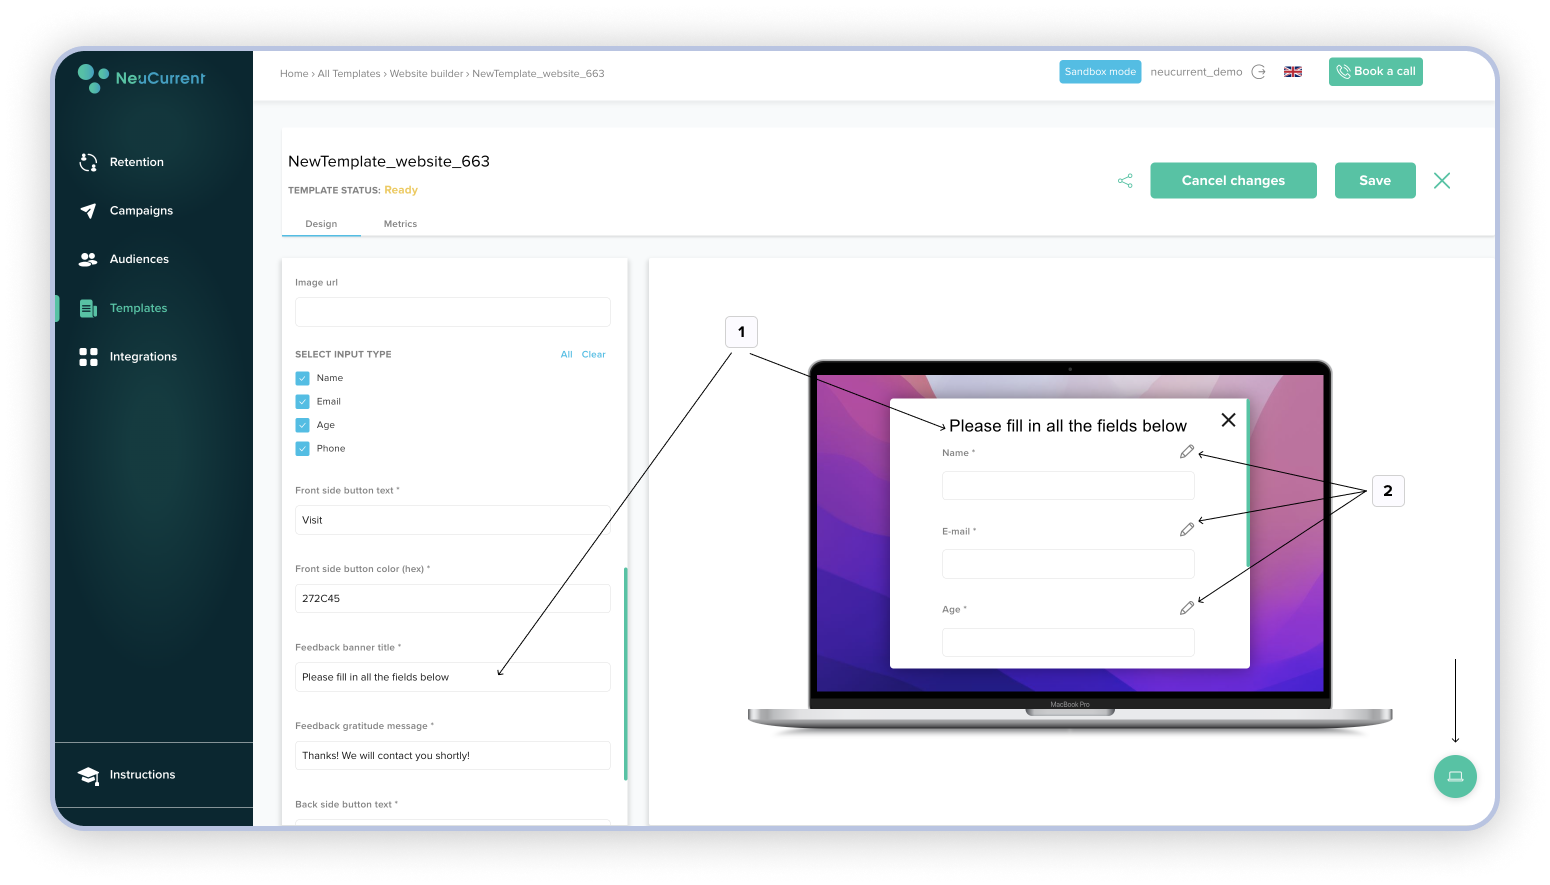
- Option to change "welcome message" and possibility to set an alternative name for each of fields to be filled in
Note
Click on the "Go To" button to get to the section with the form to be filled in
- You can change colour and text of feedback button
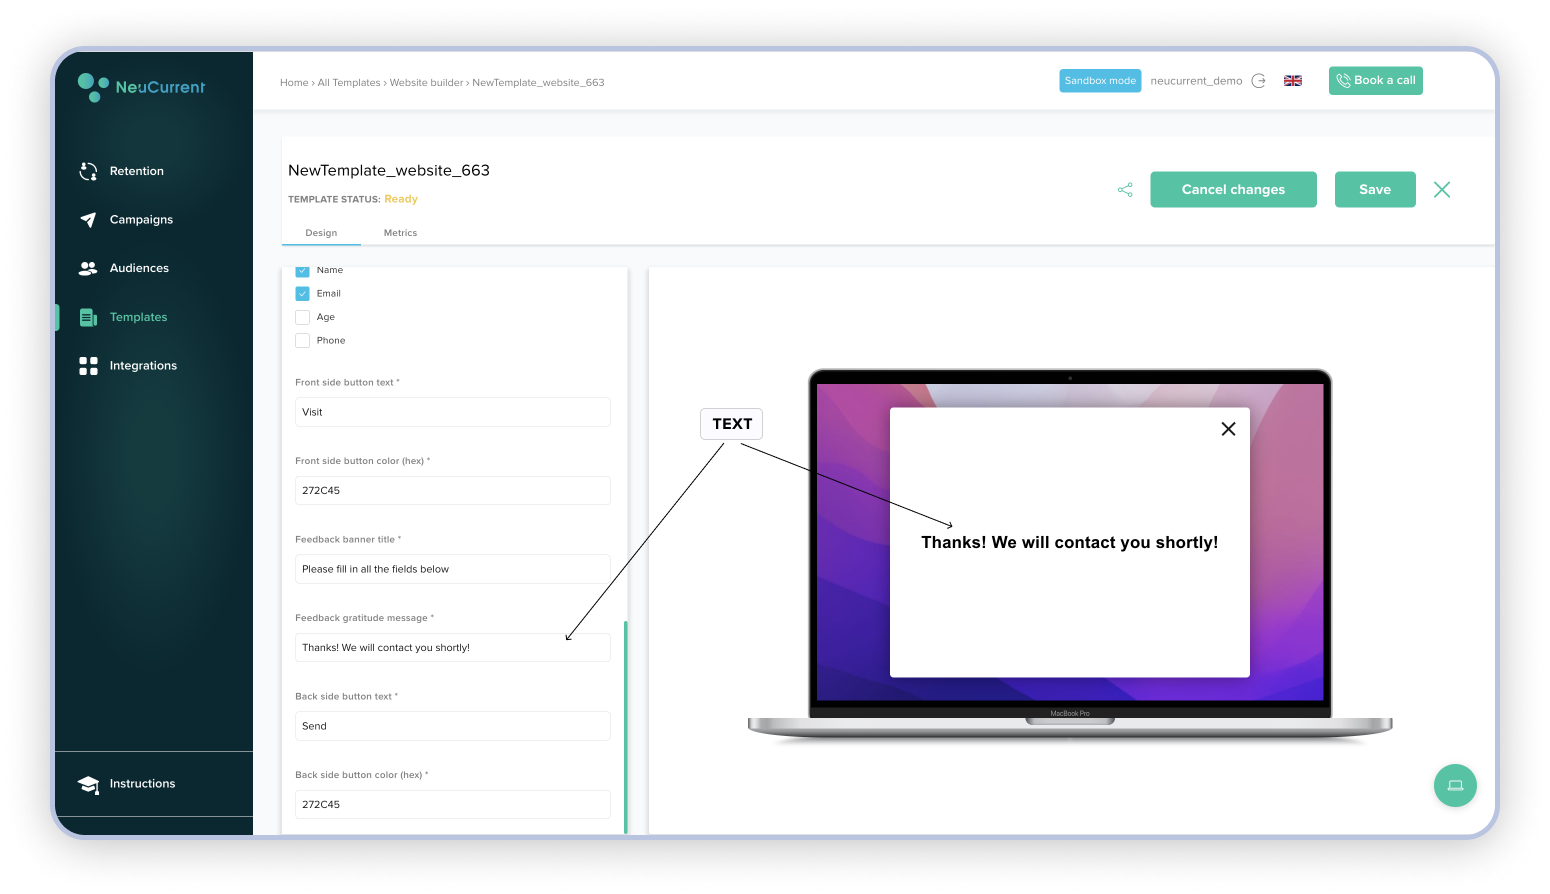
- You can change the text of message which will be shown to user after he/she fills feedback form
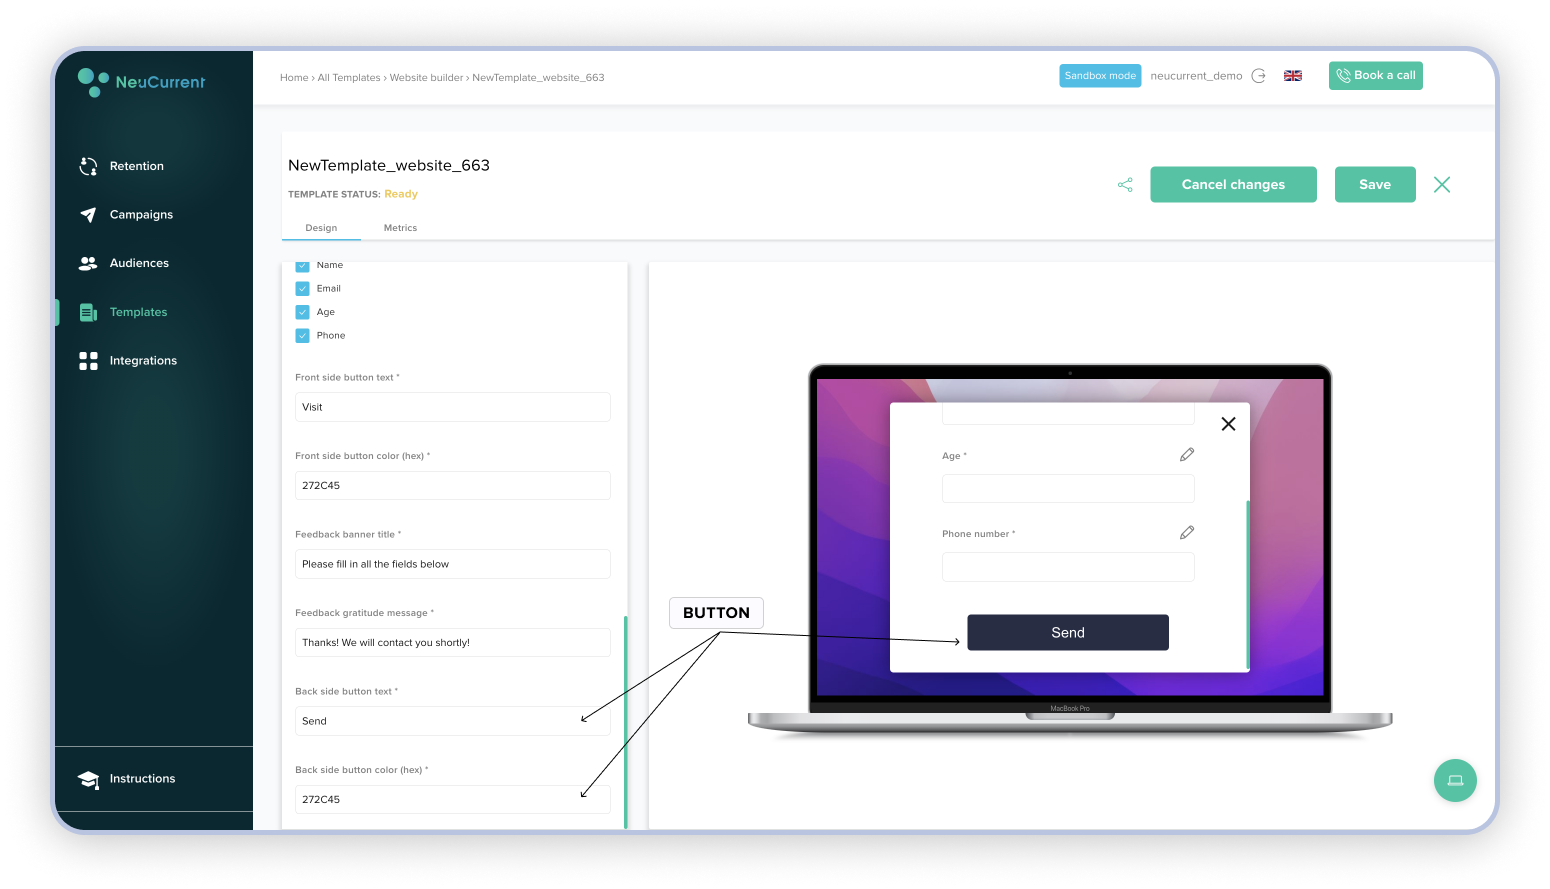
- You can select colour and text for the button. Colour is specified in HEX format (example: #FFFFFFFF - white)

- Specify the link to which the user will be redirected after interacting with the banner
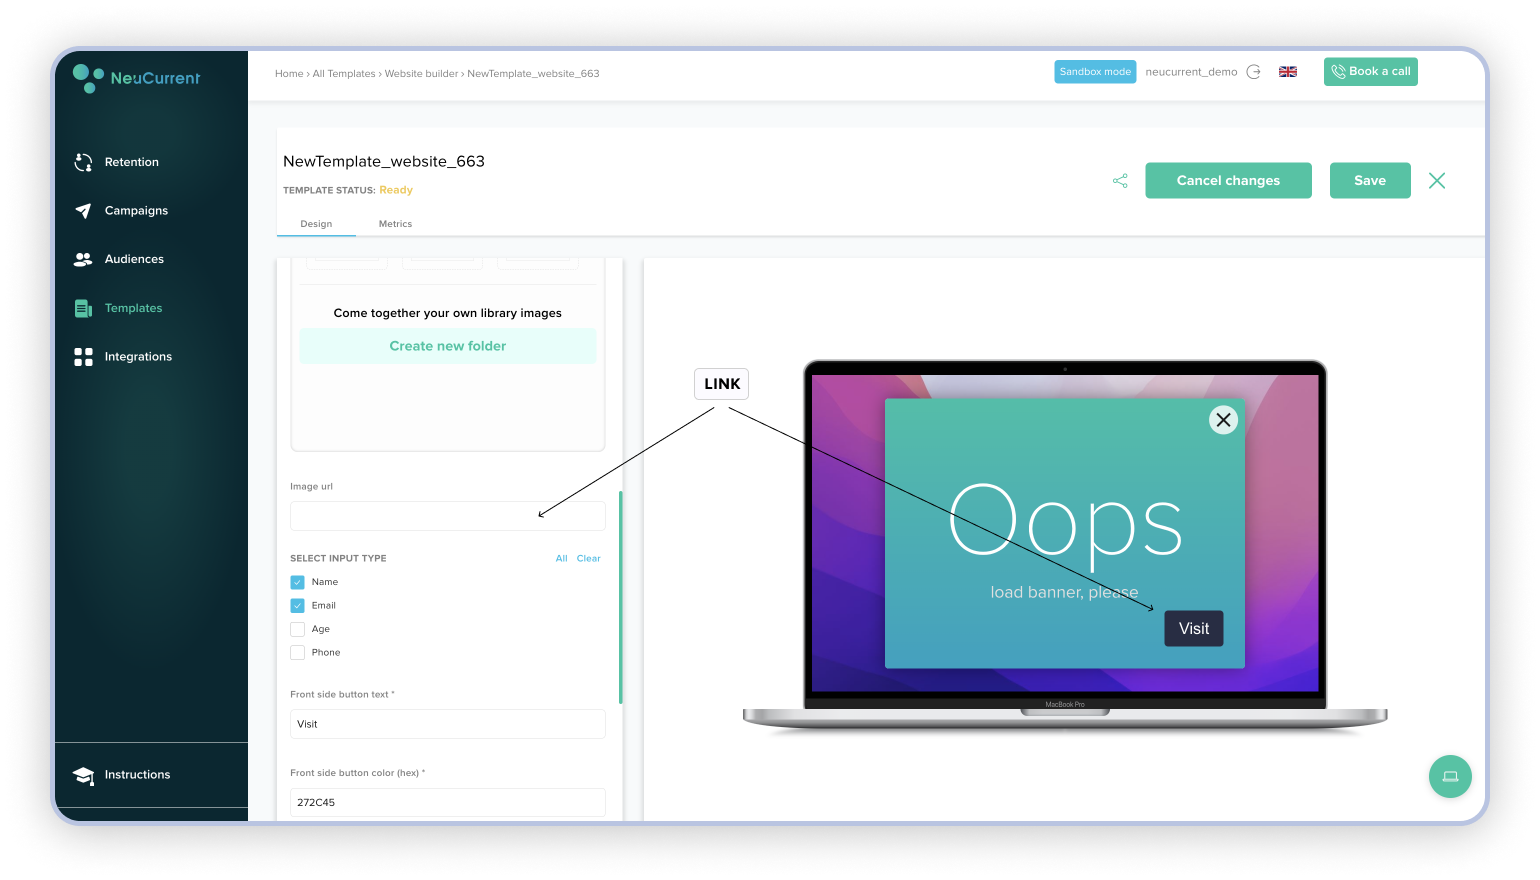
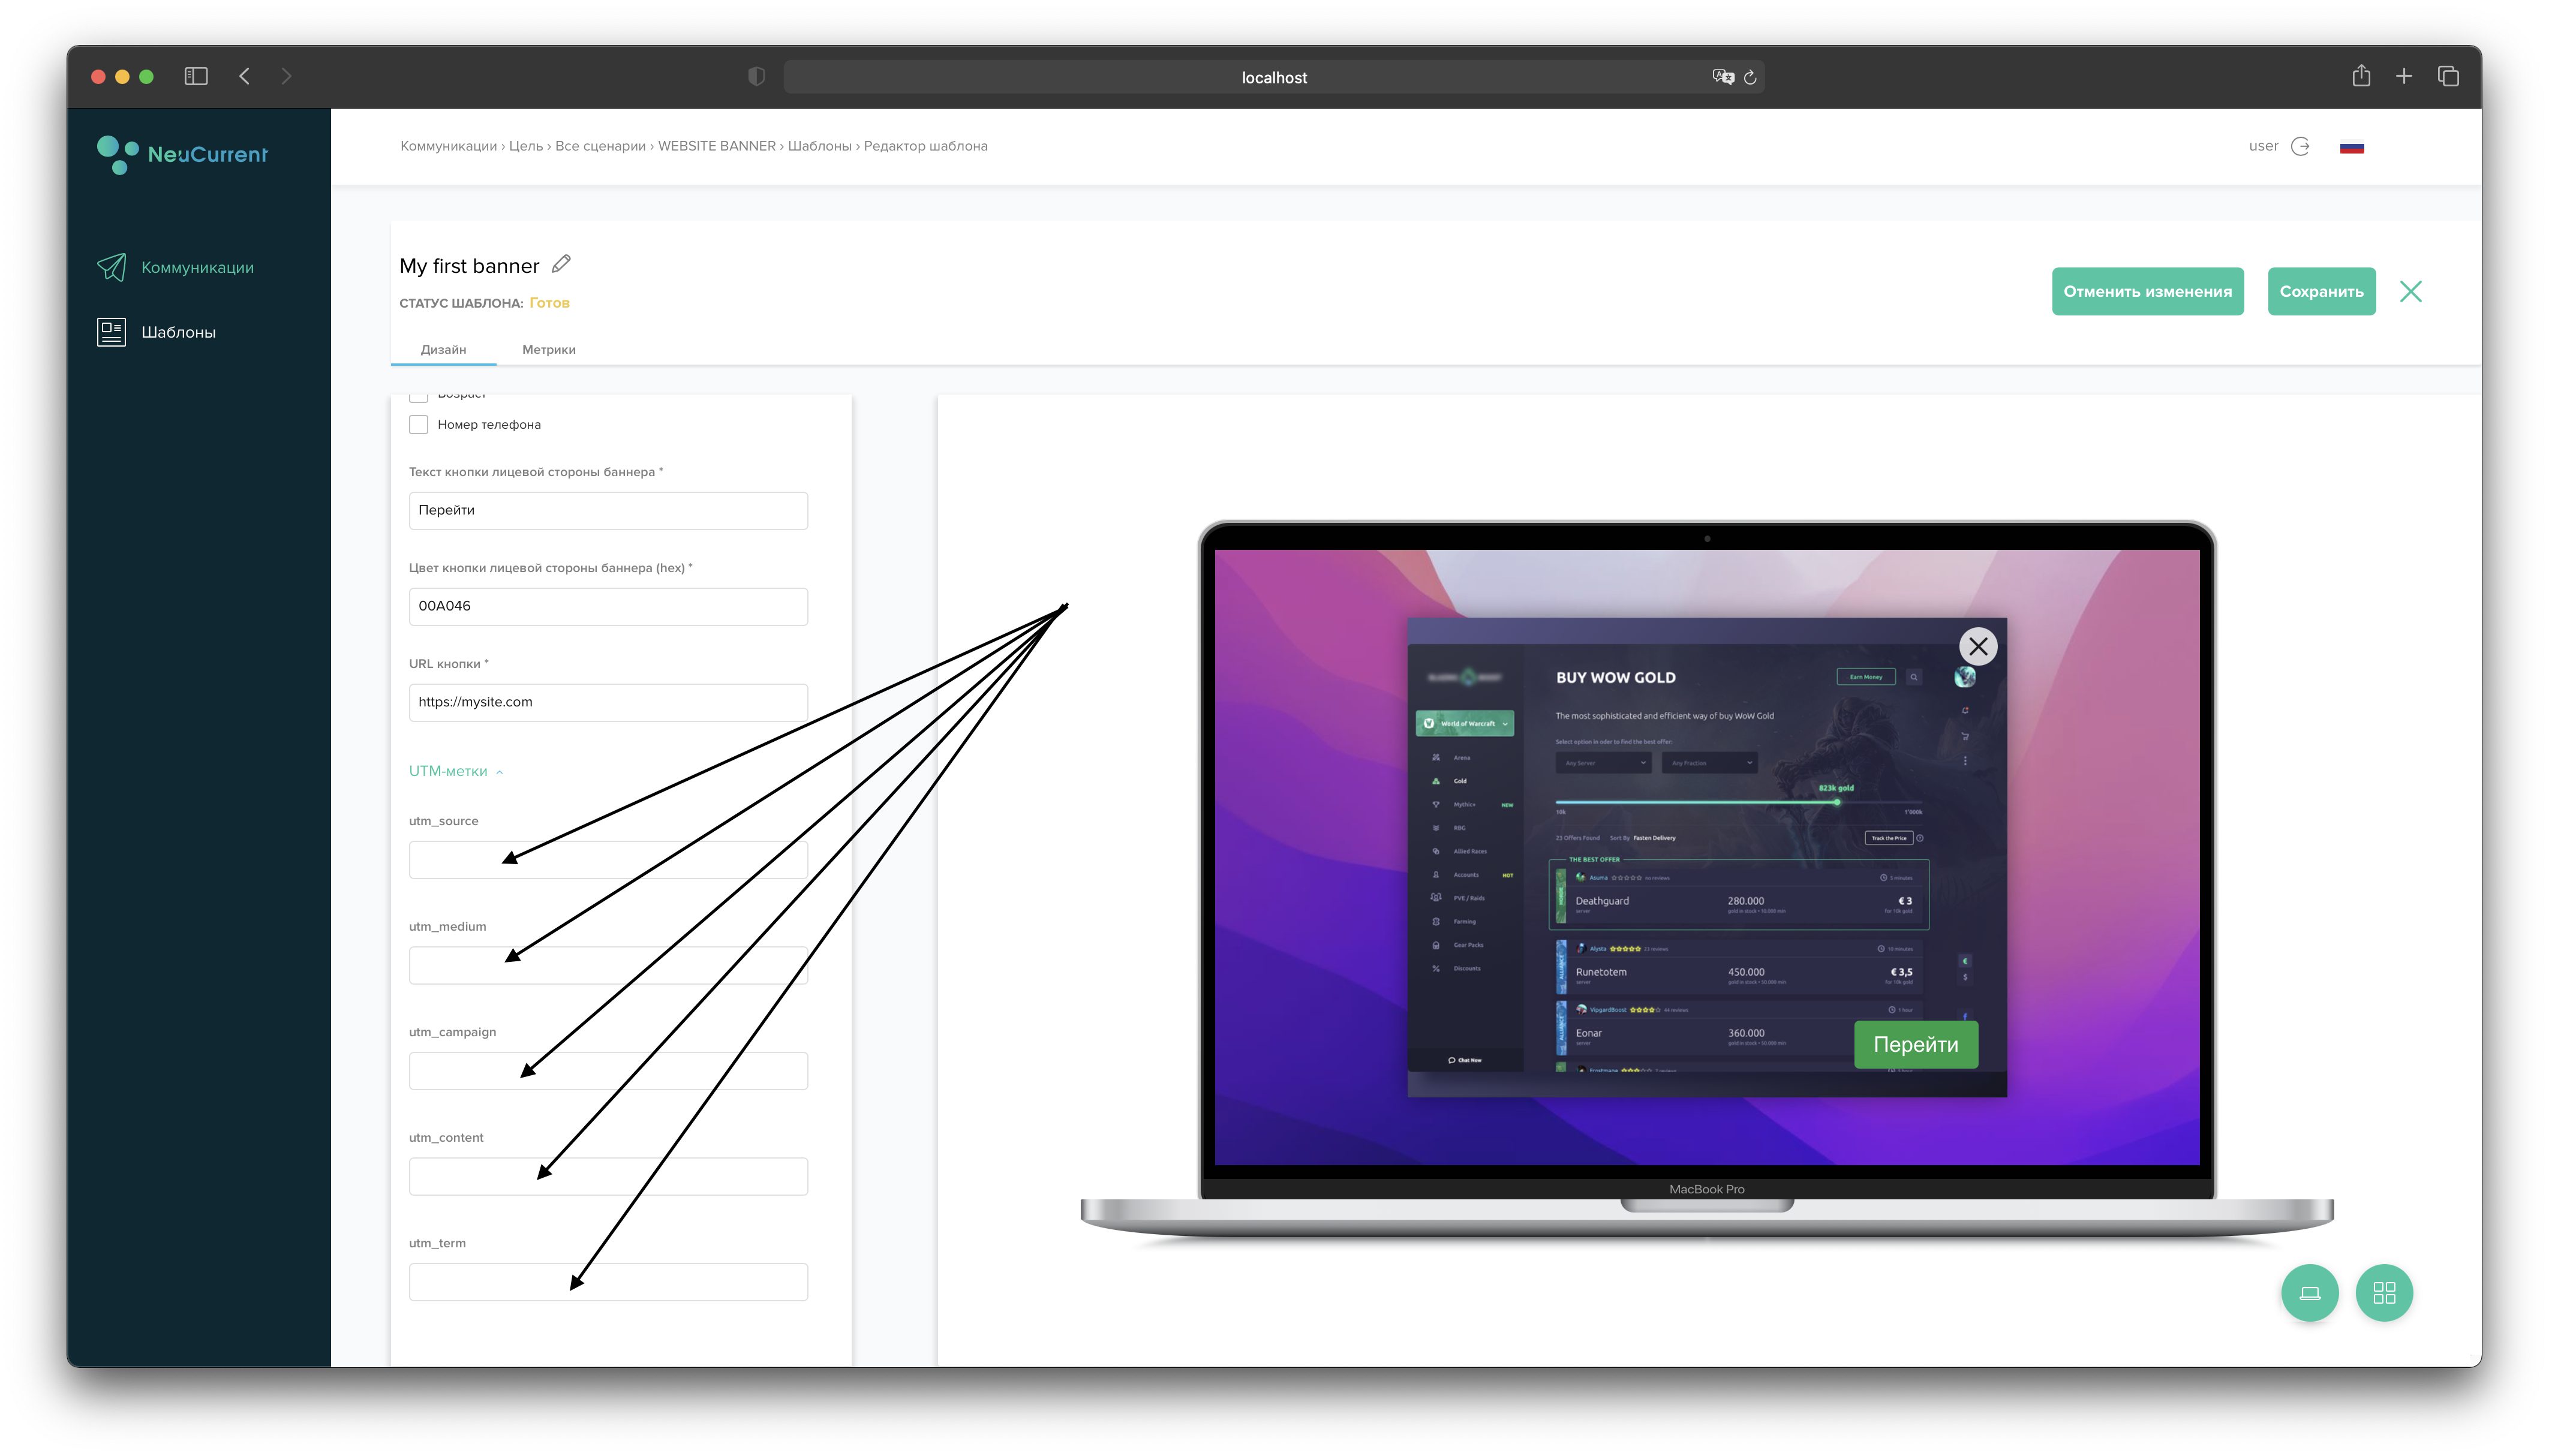
- If necessary, complete the UTM tag fields. They will be automatically filled in the banner link
Conclusion
You need to click the "Save" button in the top right corner of the screen. And you will see a message telling you that your template has been successfully saved. One last thing, click on icon as shown on the picture below and copy banner script to connect it to your website.
